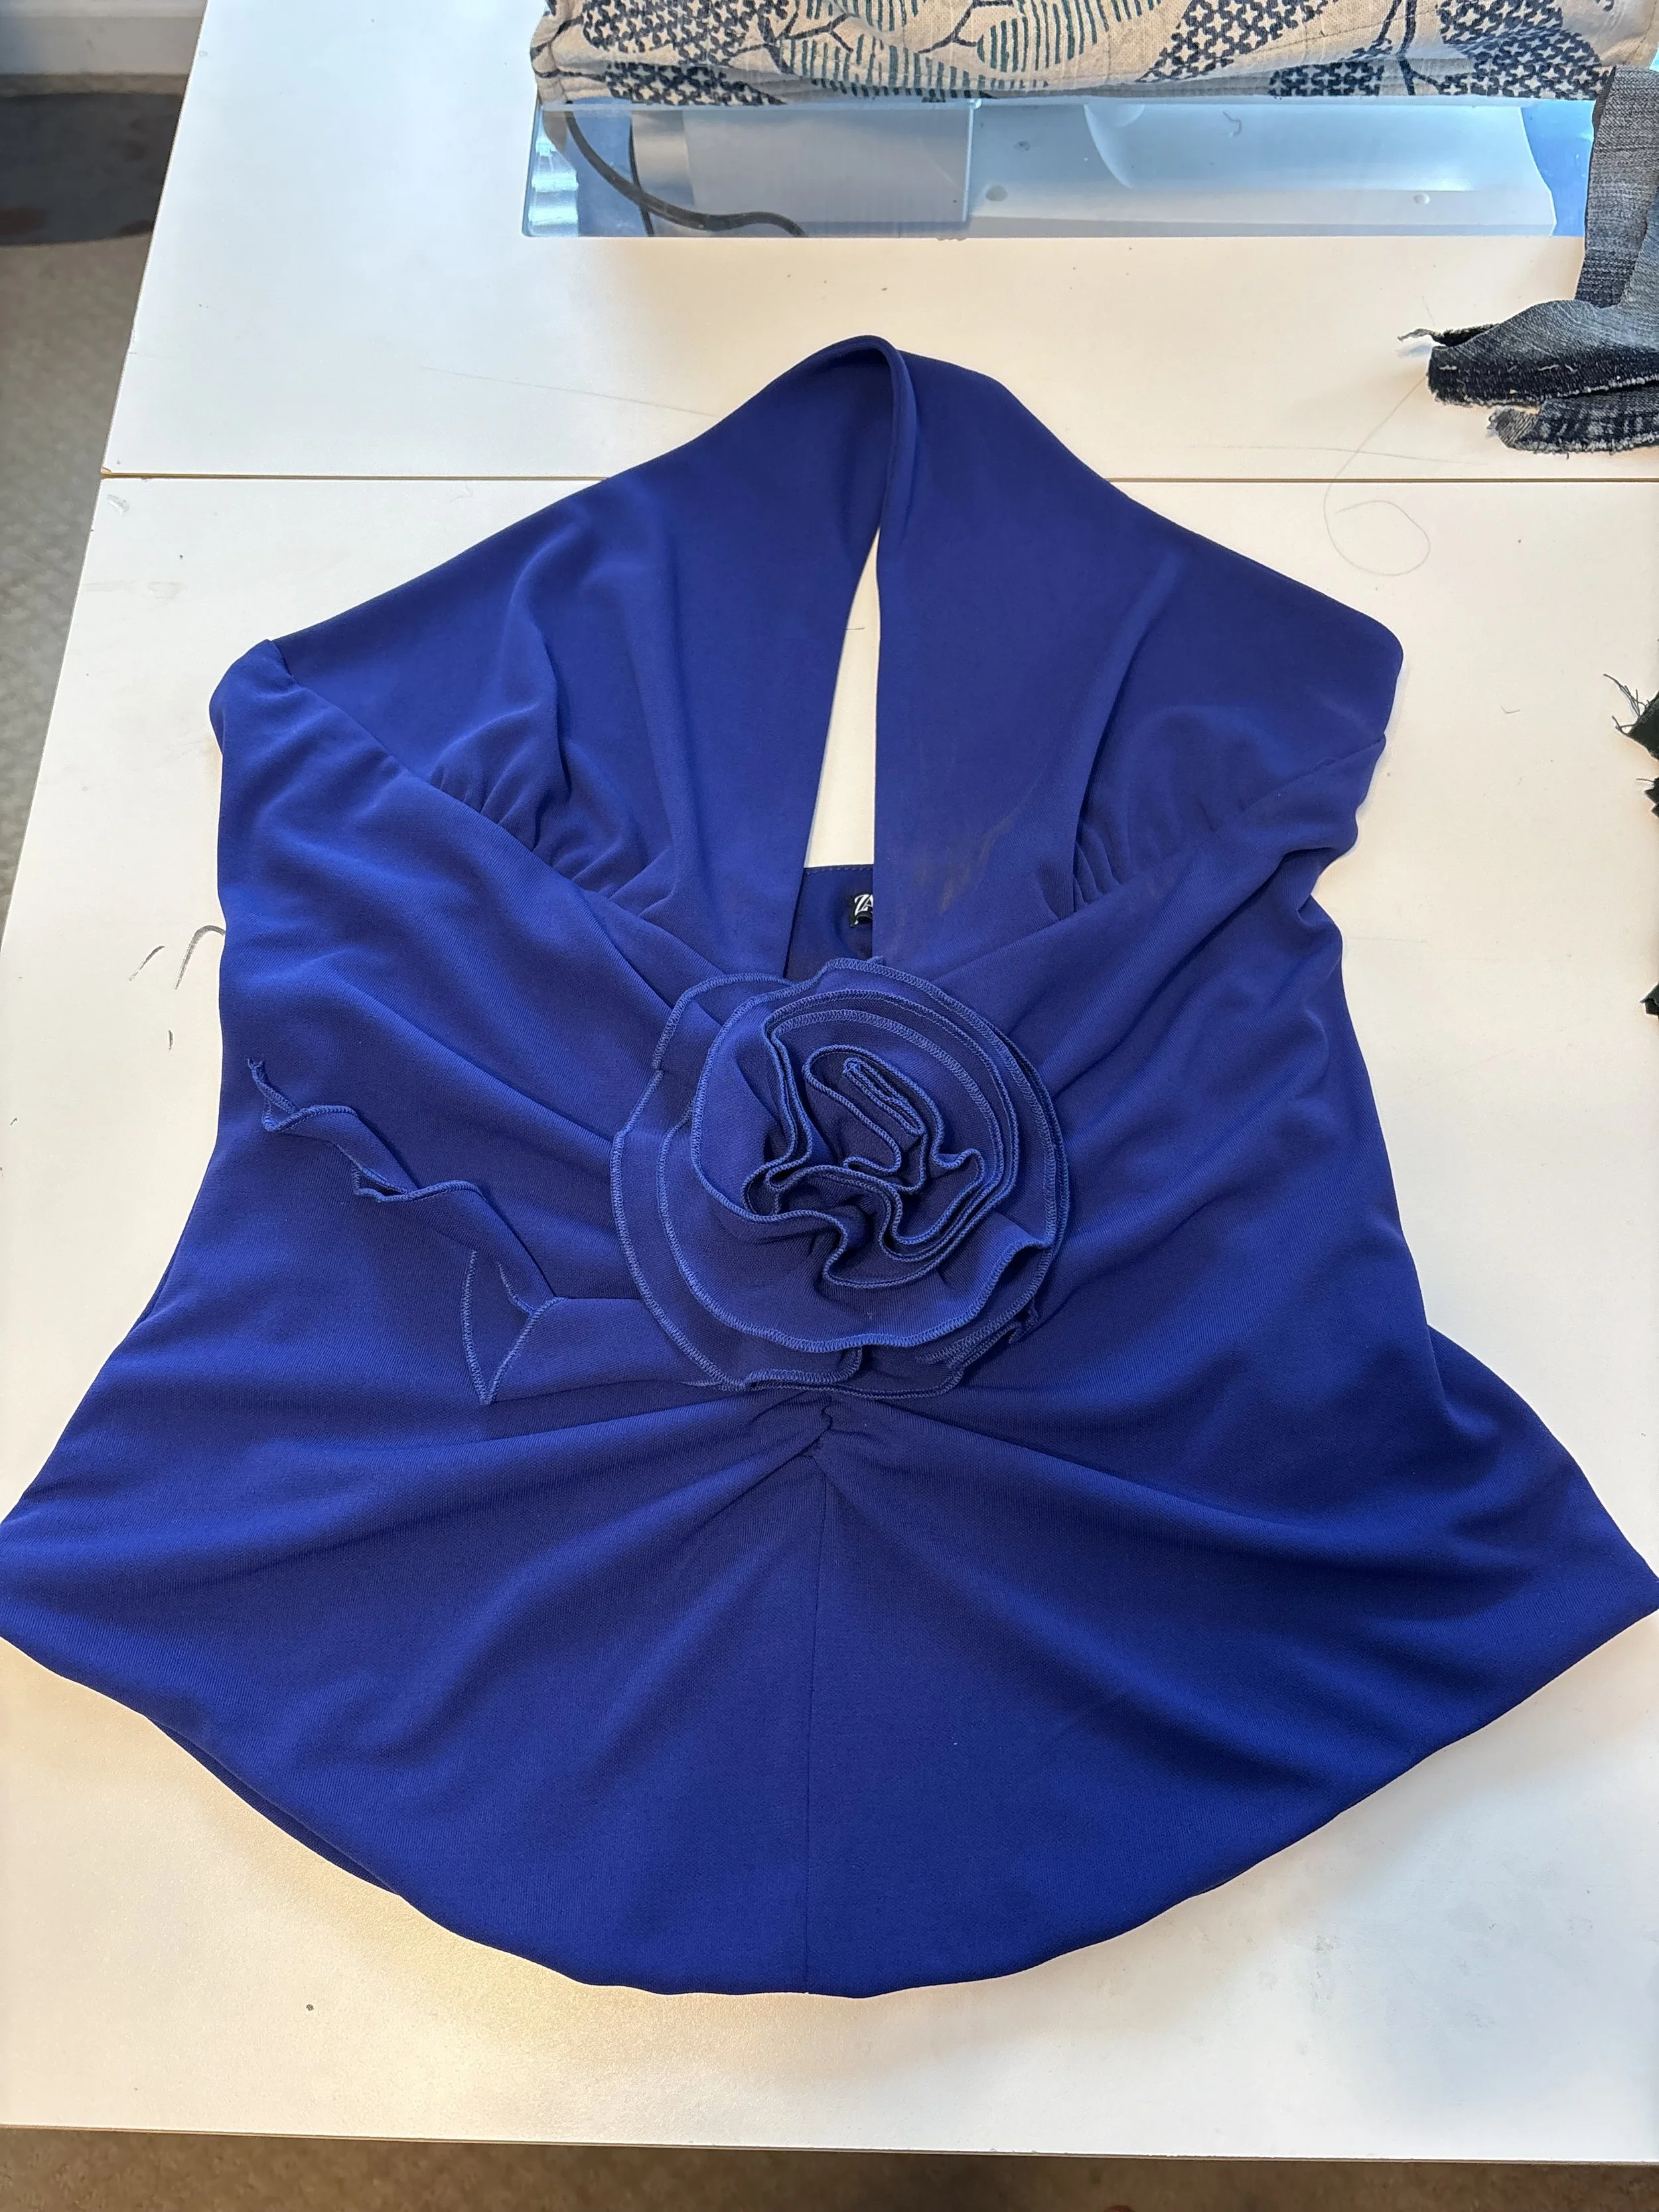
Earlier this week a friend reached out to me with a few quick alterations before my mom and I leave for our brief vibe-about in Spain. Very easy and simple fixes that I can usually knock out in a couple of days - no sweat.
At least for three items…
The last one is easily the trickiest one of the batch, as it’s going to require a little refashioning in it’s own right.
So, to give you a better idea of what my daily grind usually looks like, I’d thought I’d take you through the process of applying my refashioning to clothes for my friends and clients.
It’s not as stressful as you may be thinking - trust me, this is gonna be fun:
Now, while the design of this body-suit is just fine on it’s own, it definitely needed adjustments so that my friend could wear it.
When she came in for her fitting, I had her try it the way it was intended to be worn… and the difference was night and day…

Bodysuit on sewing form;
out of respect for my clients’ privacy, I don’t like to share before/after pics without their expressed permission… there are a lot of creeps on the internet…
As I said, the original design is just fine on its own. However, the reason it didn’t work for my client, is all in the size; she’s petite with a slender build, and, believe it or not, the size of this body-suit was just a tad too big for her.
That coupled with the weight of the rose of the rose at the midriff, also made the neckline just a tad too revealing for her comfort (not enough support and just a bit too much “peek-a-boo”)
However, she did figure out a new way to wear it in a way that felt comfortable and looks good; so, in this case, it’s the way she styled it which provides the frame work for the types of alterations this body suit needed to transform into blouse:
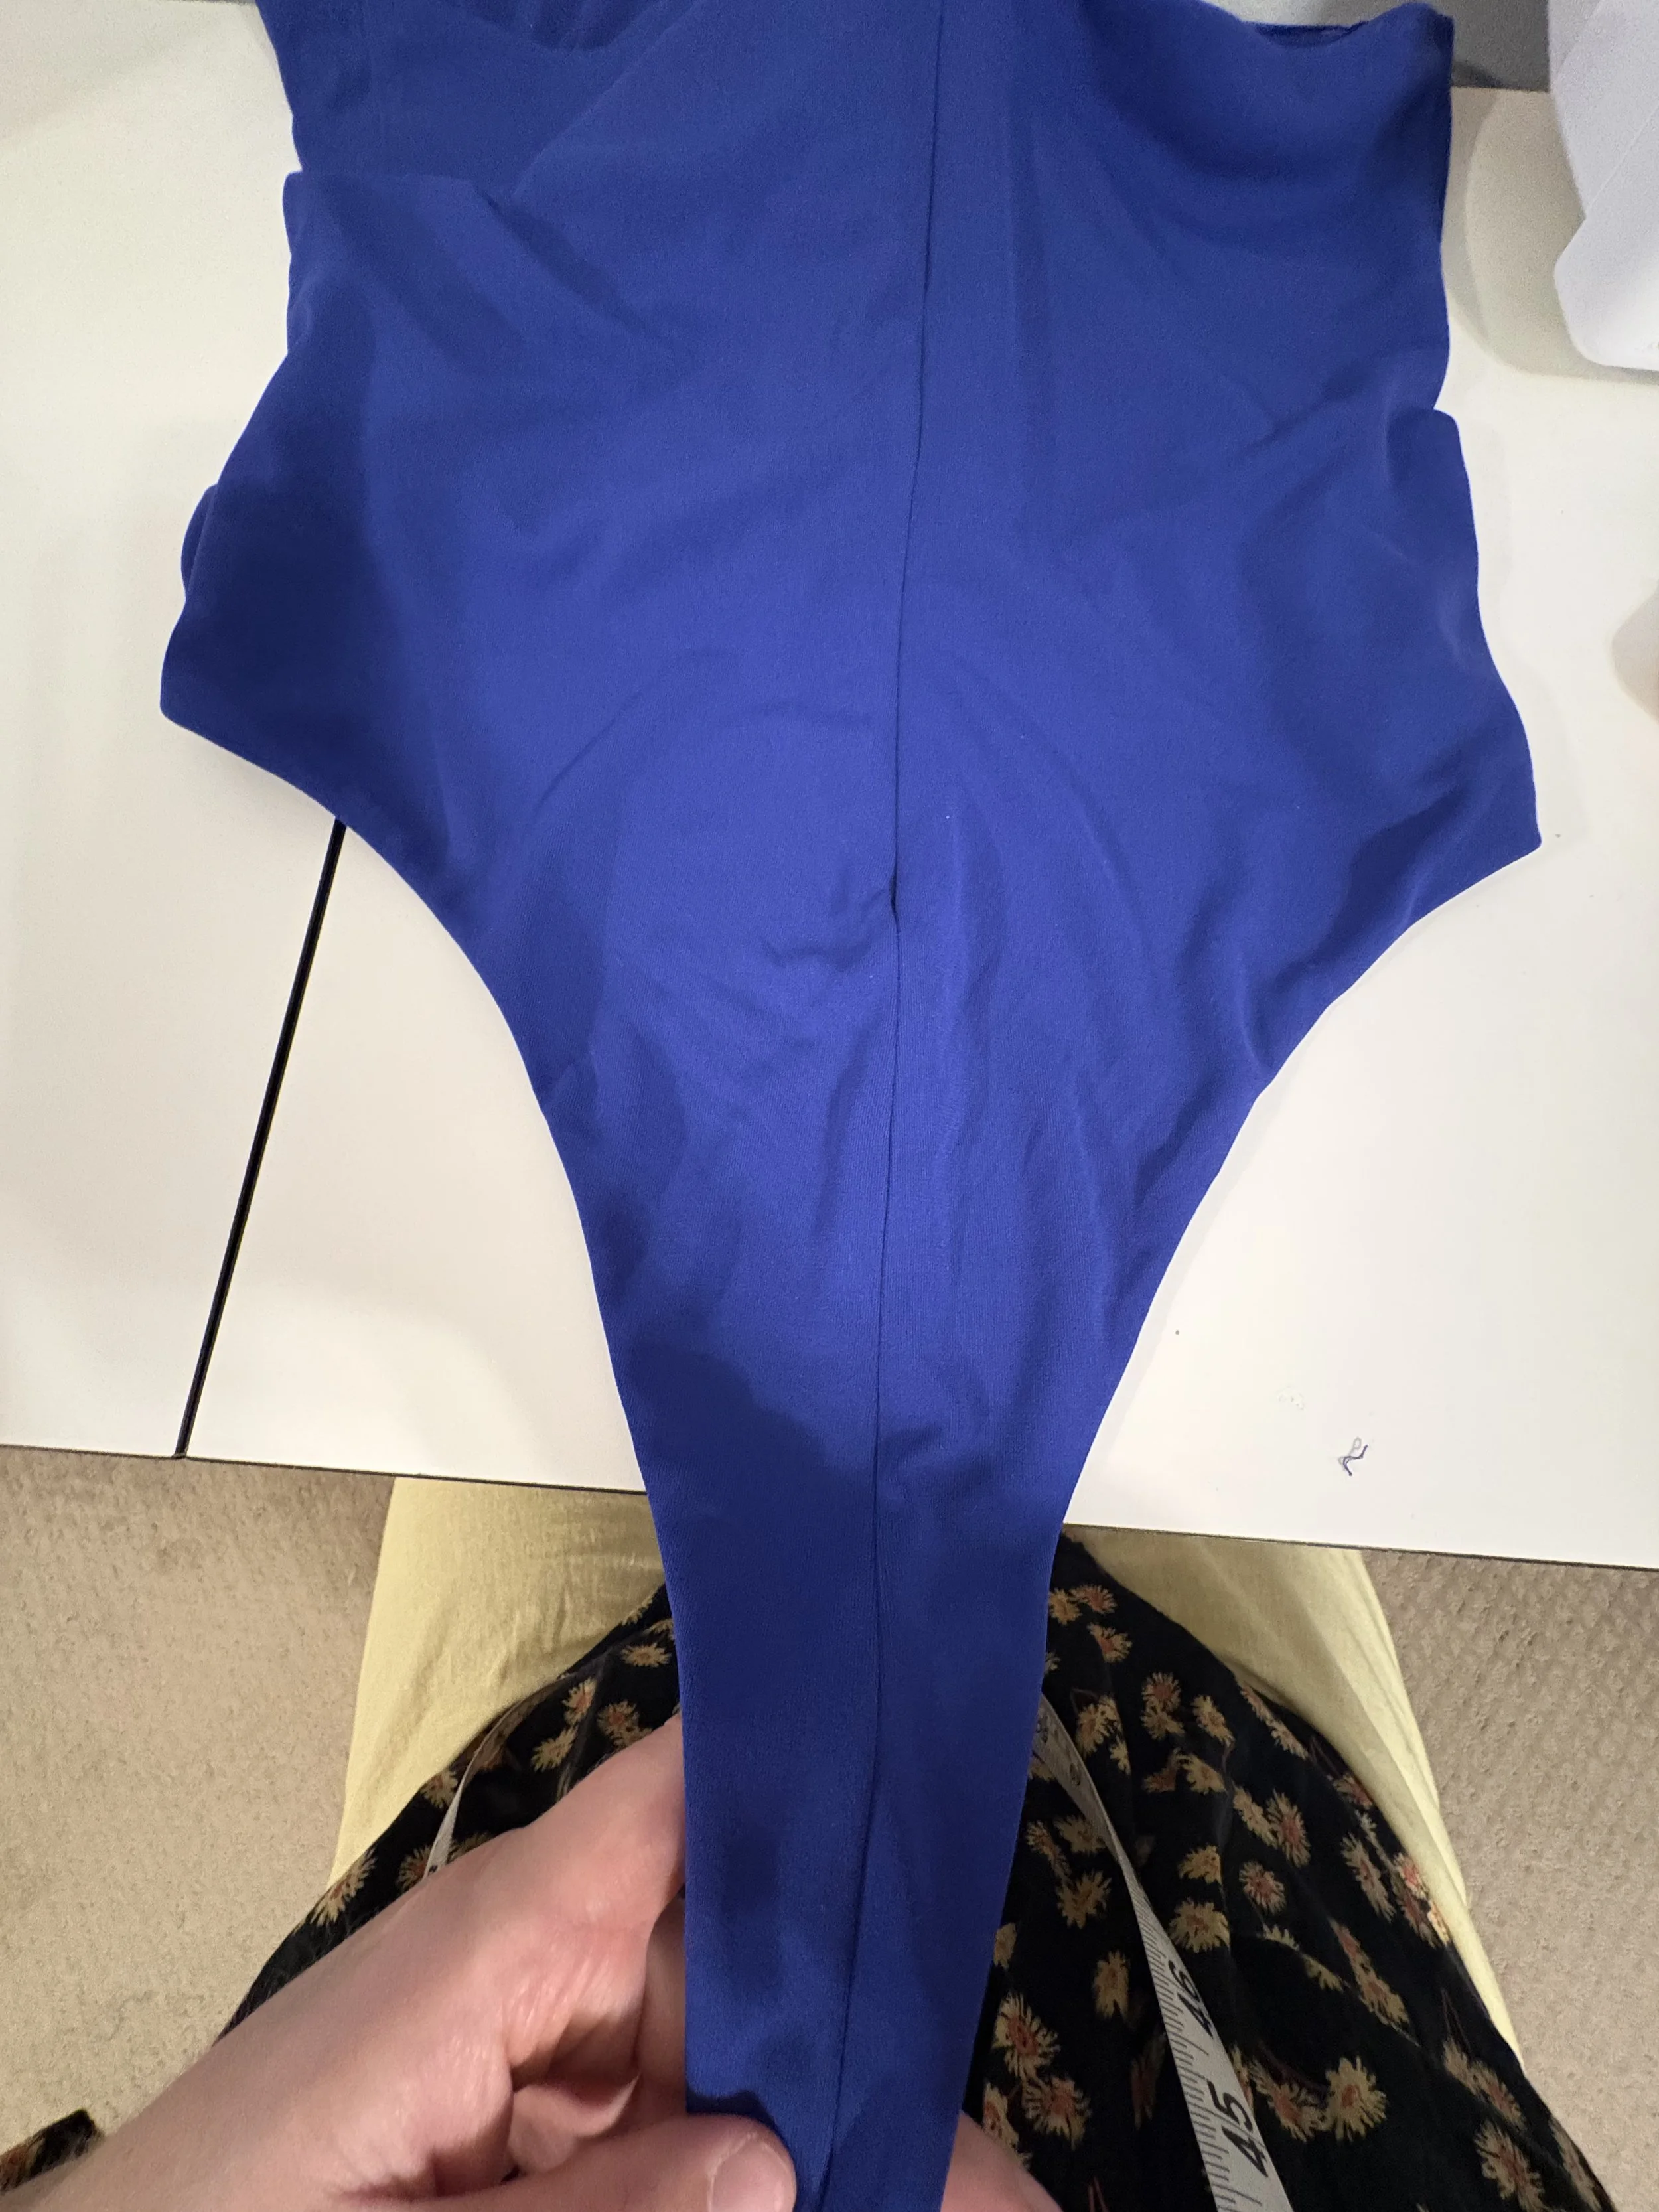

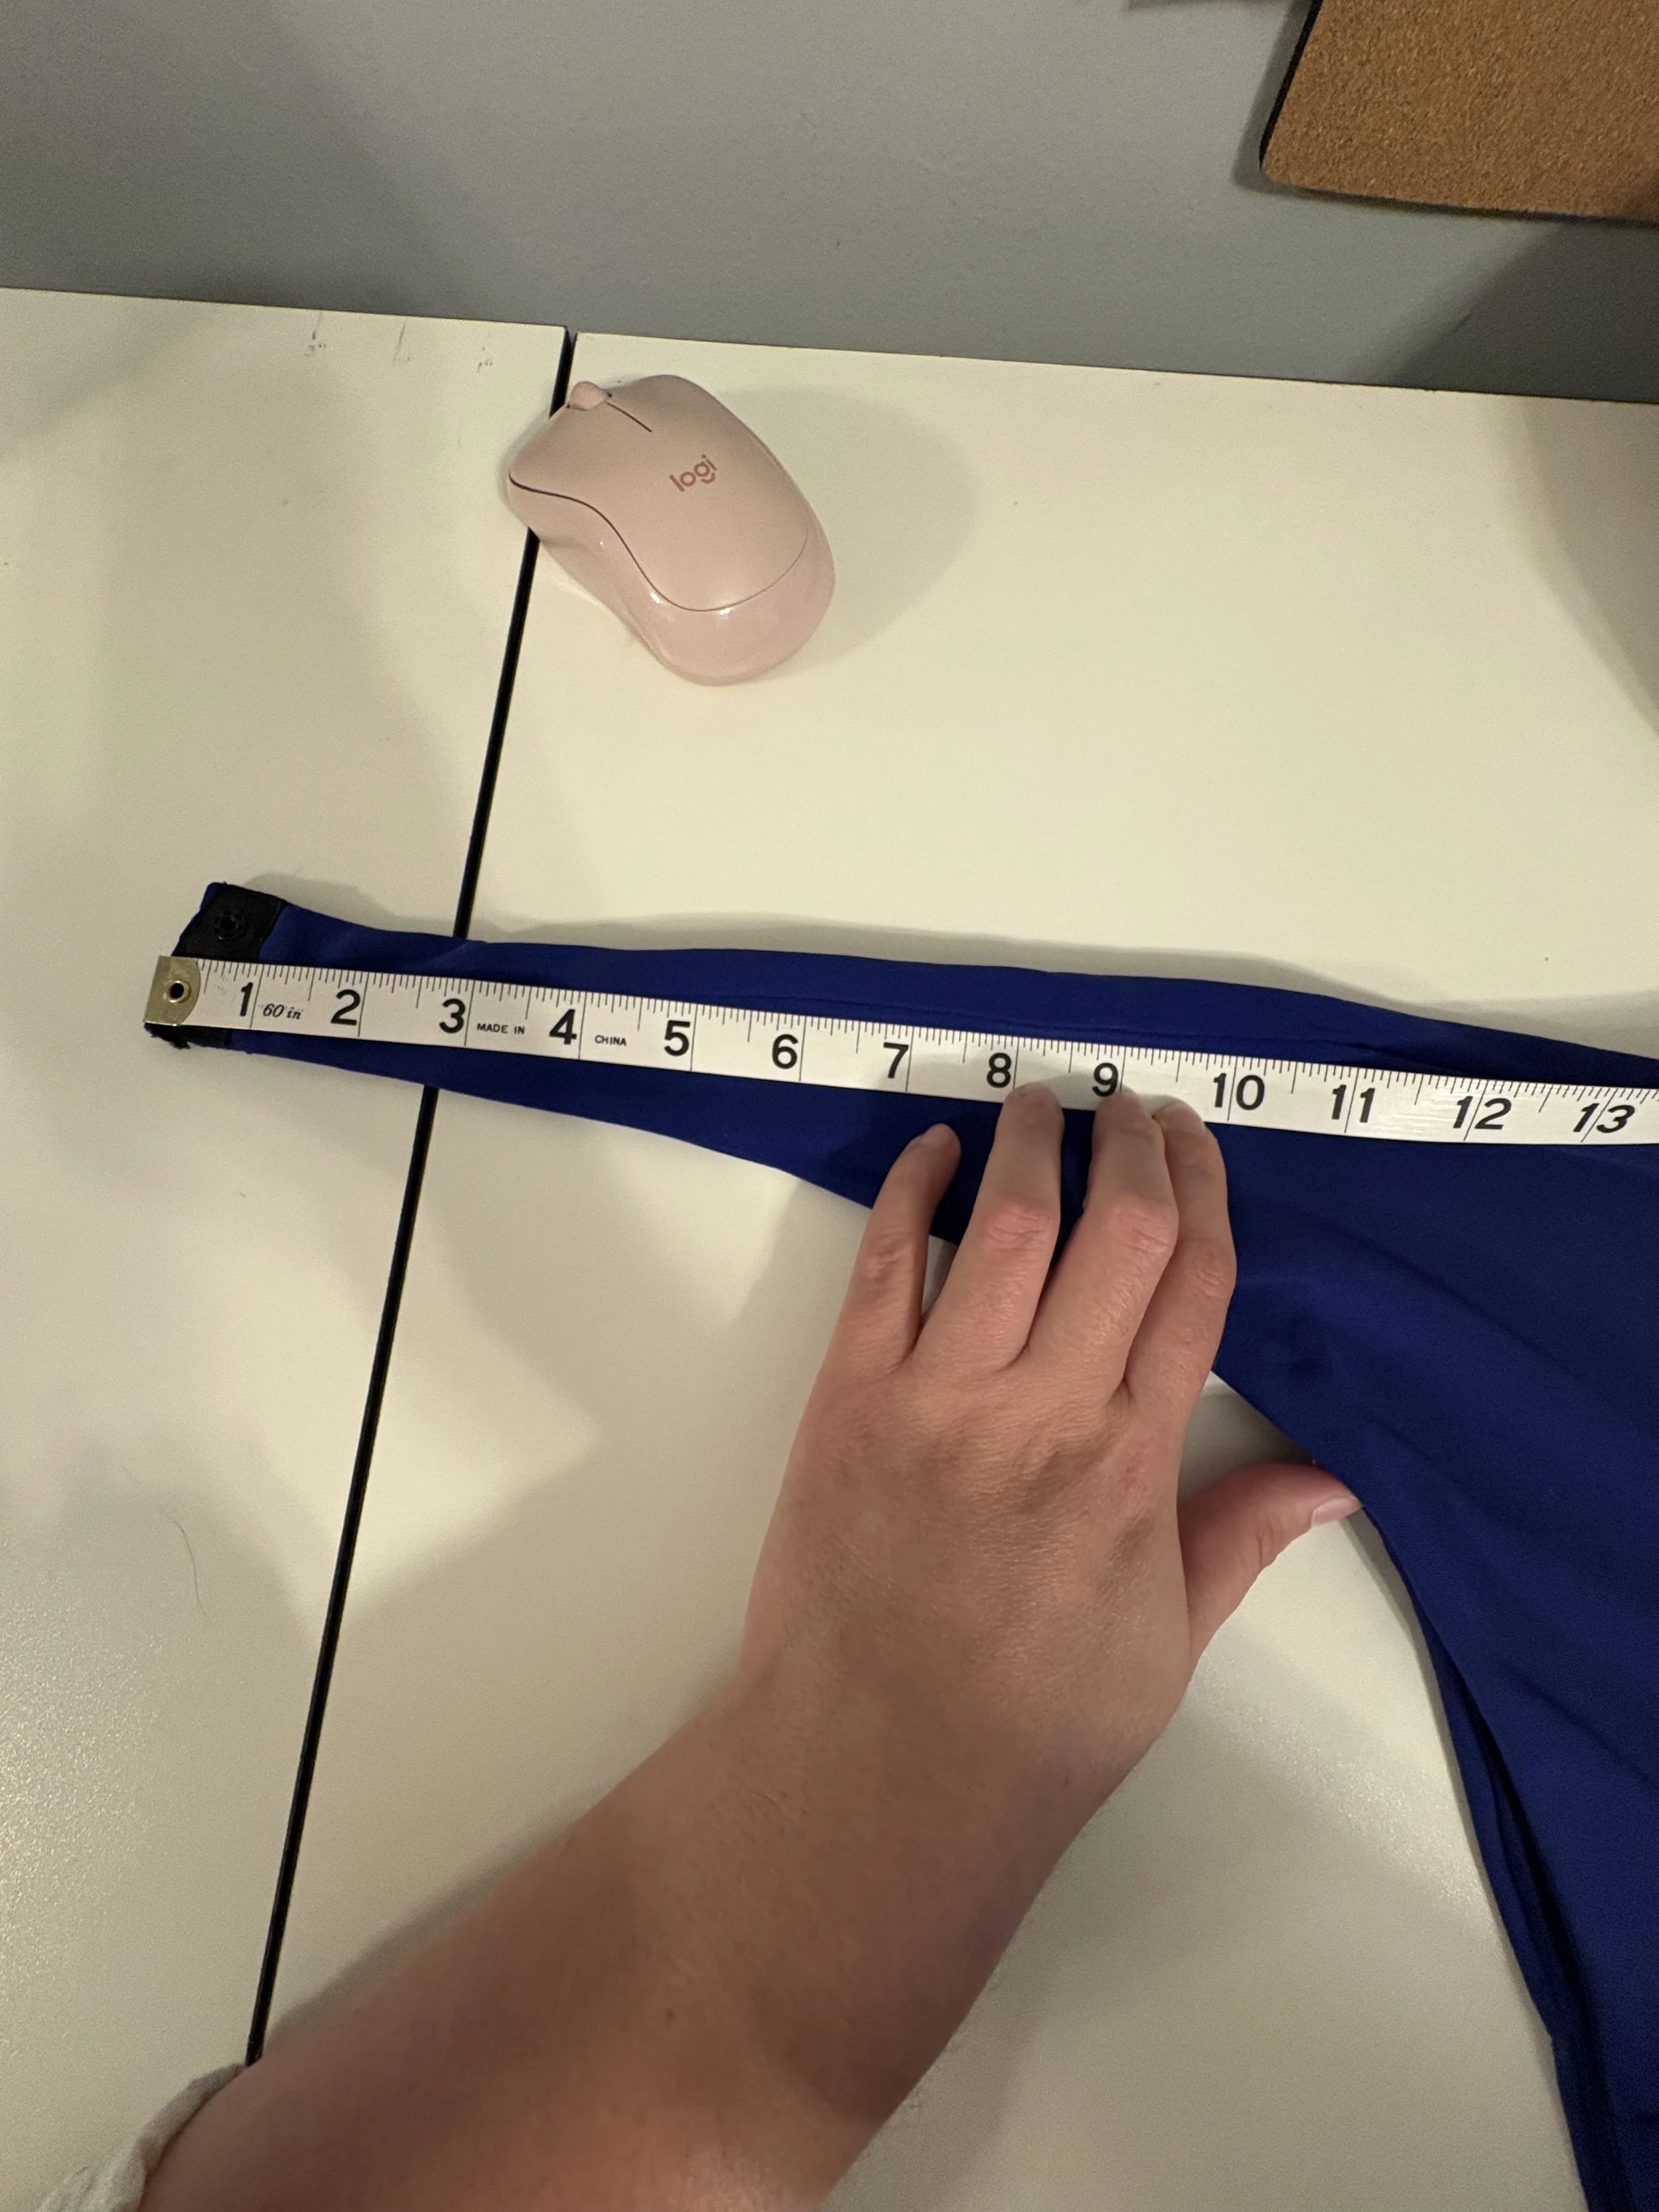
The big adjustments that needed to be made was removing the little front and back “tails” (for want of a better word), which made the body-suit; in this case, that meant trimming them away to create a new hemline - ideally one that is straight, but in the end I decided to make it curved because of the way the bodysuit was cut and pieced. This means the lines can always be adjusted later, but for now the top will have a much more “flirtatious” hemline while being able to cover the tops of a pair of slacks or a skirt.
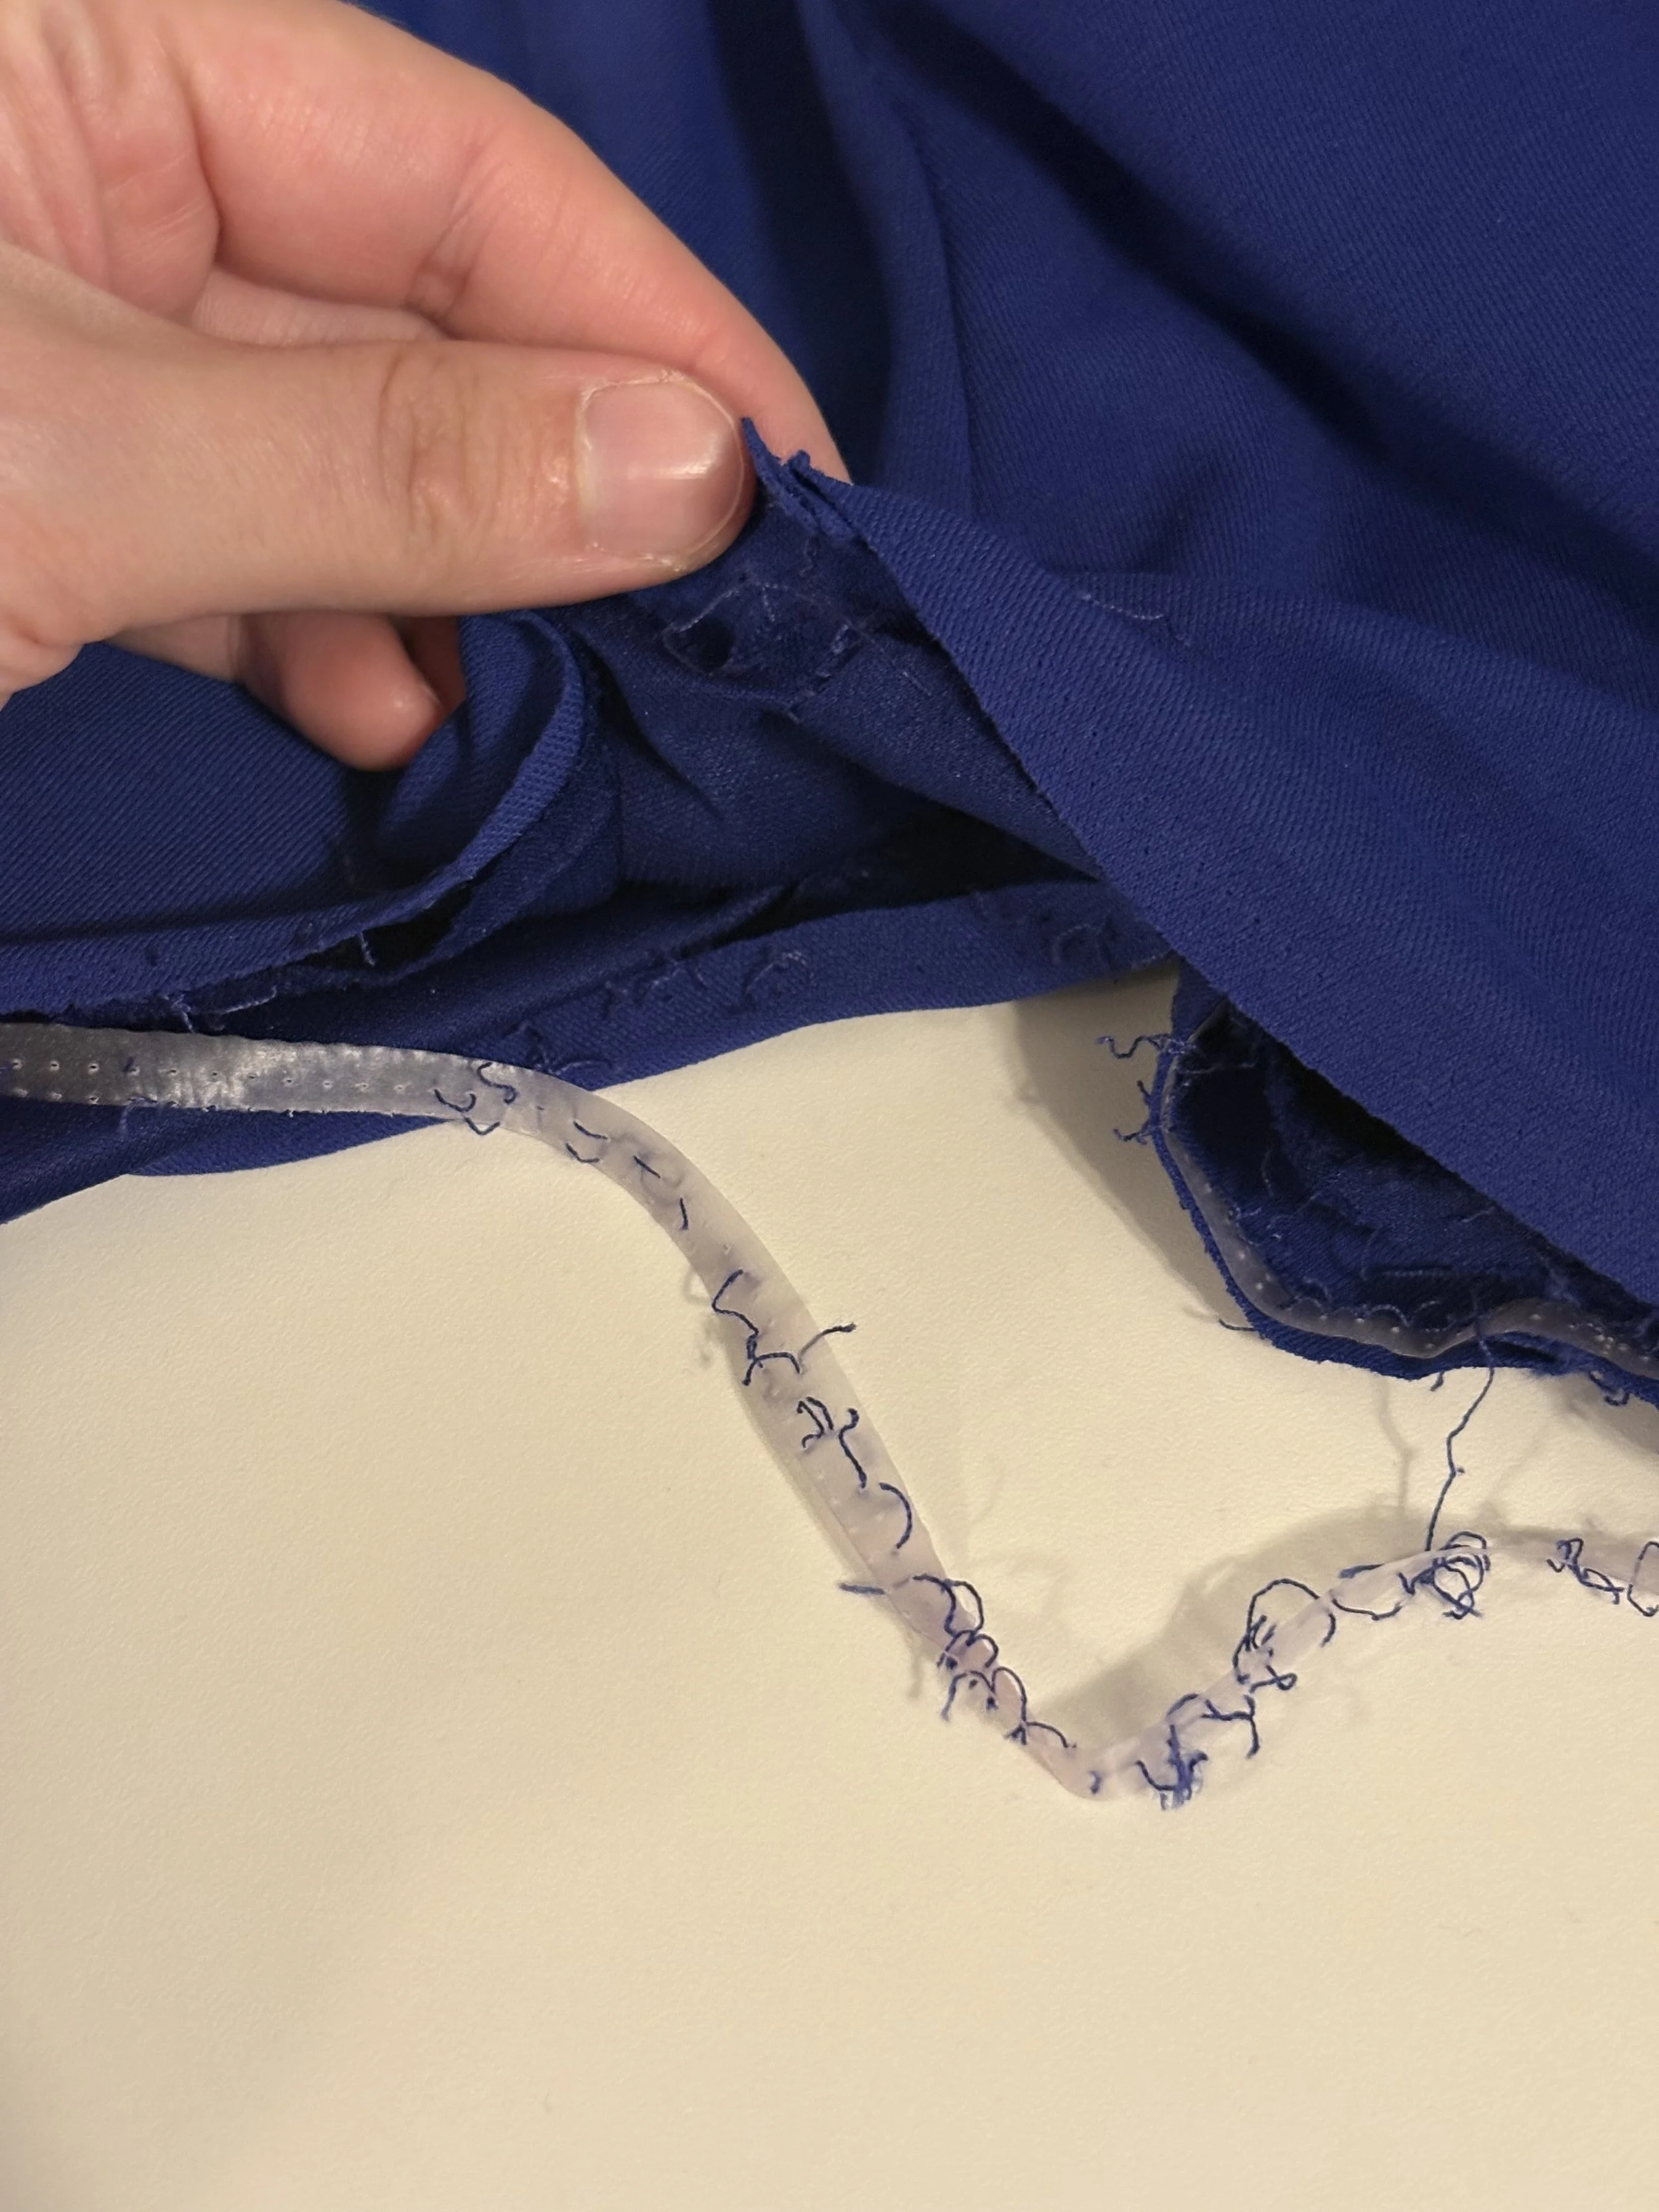
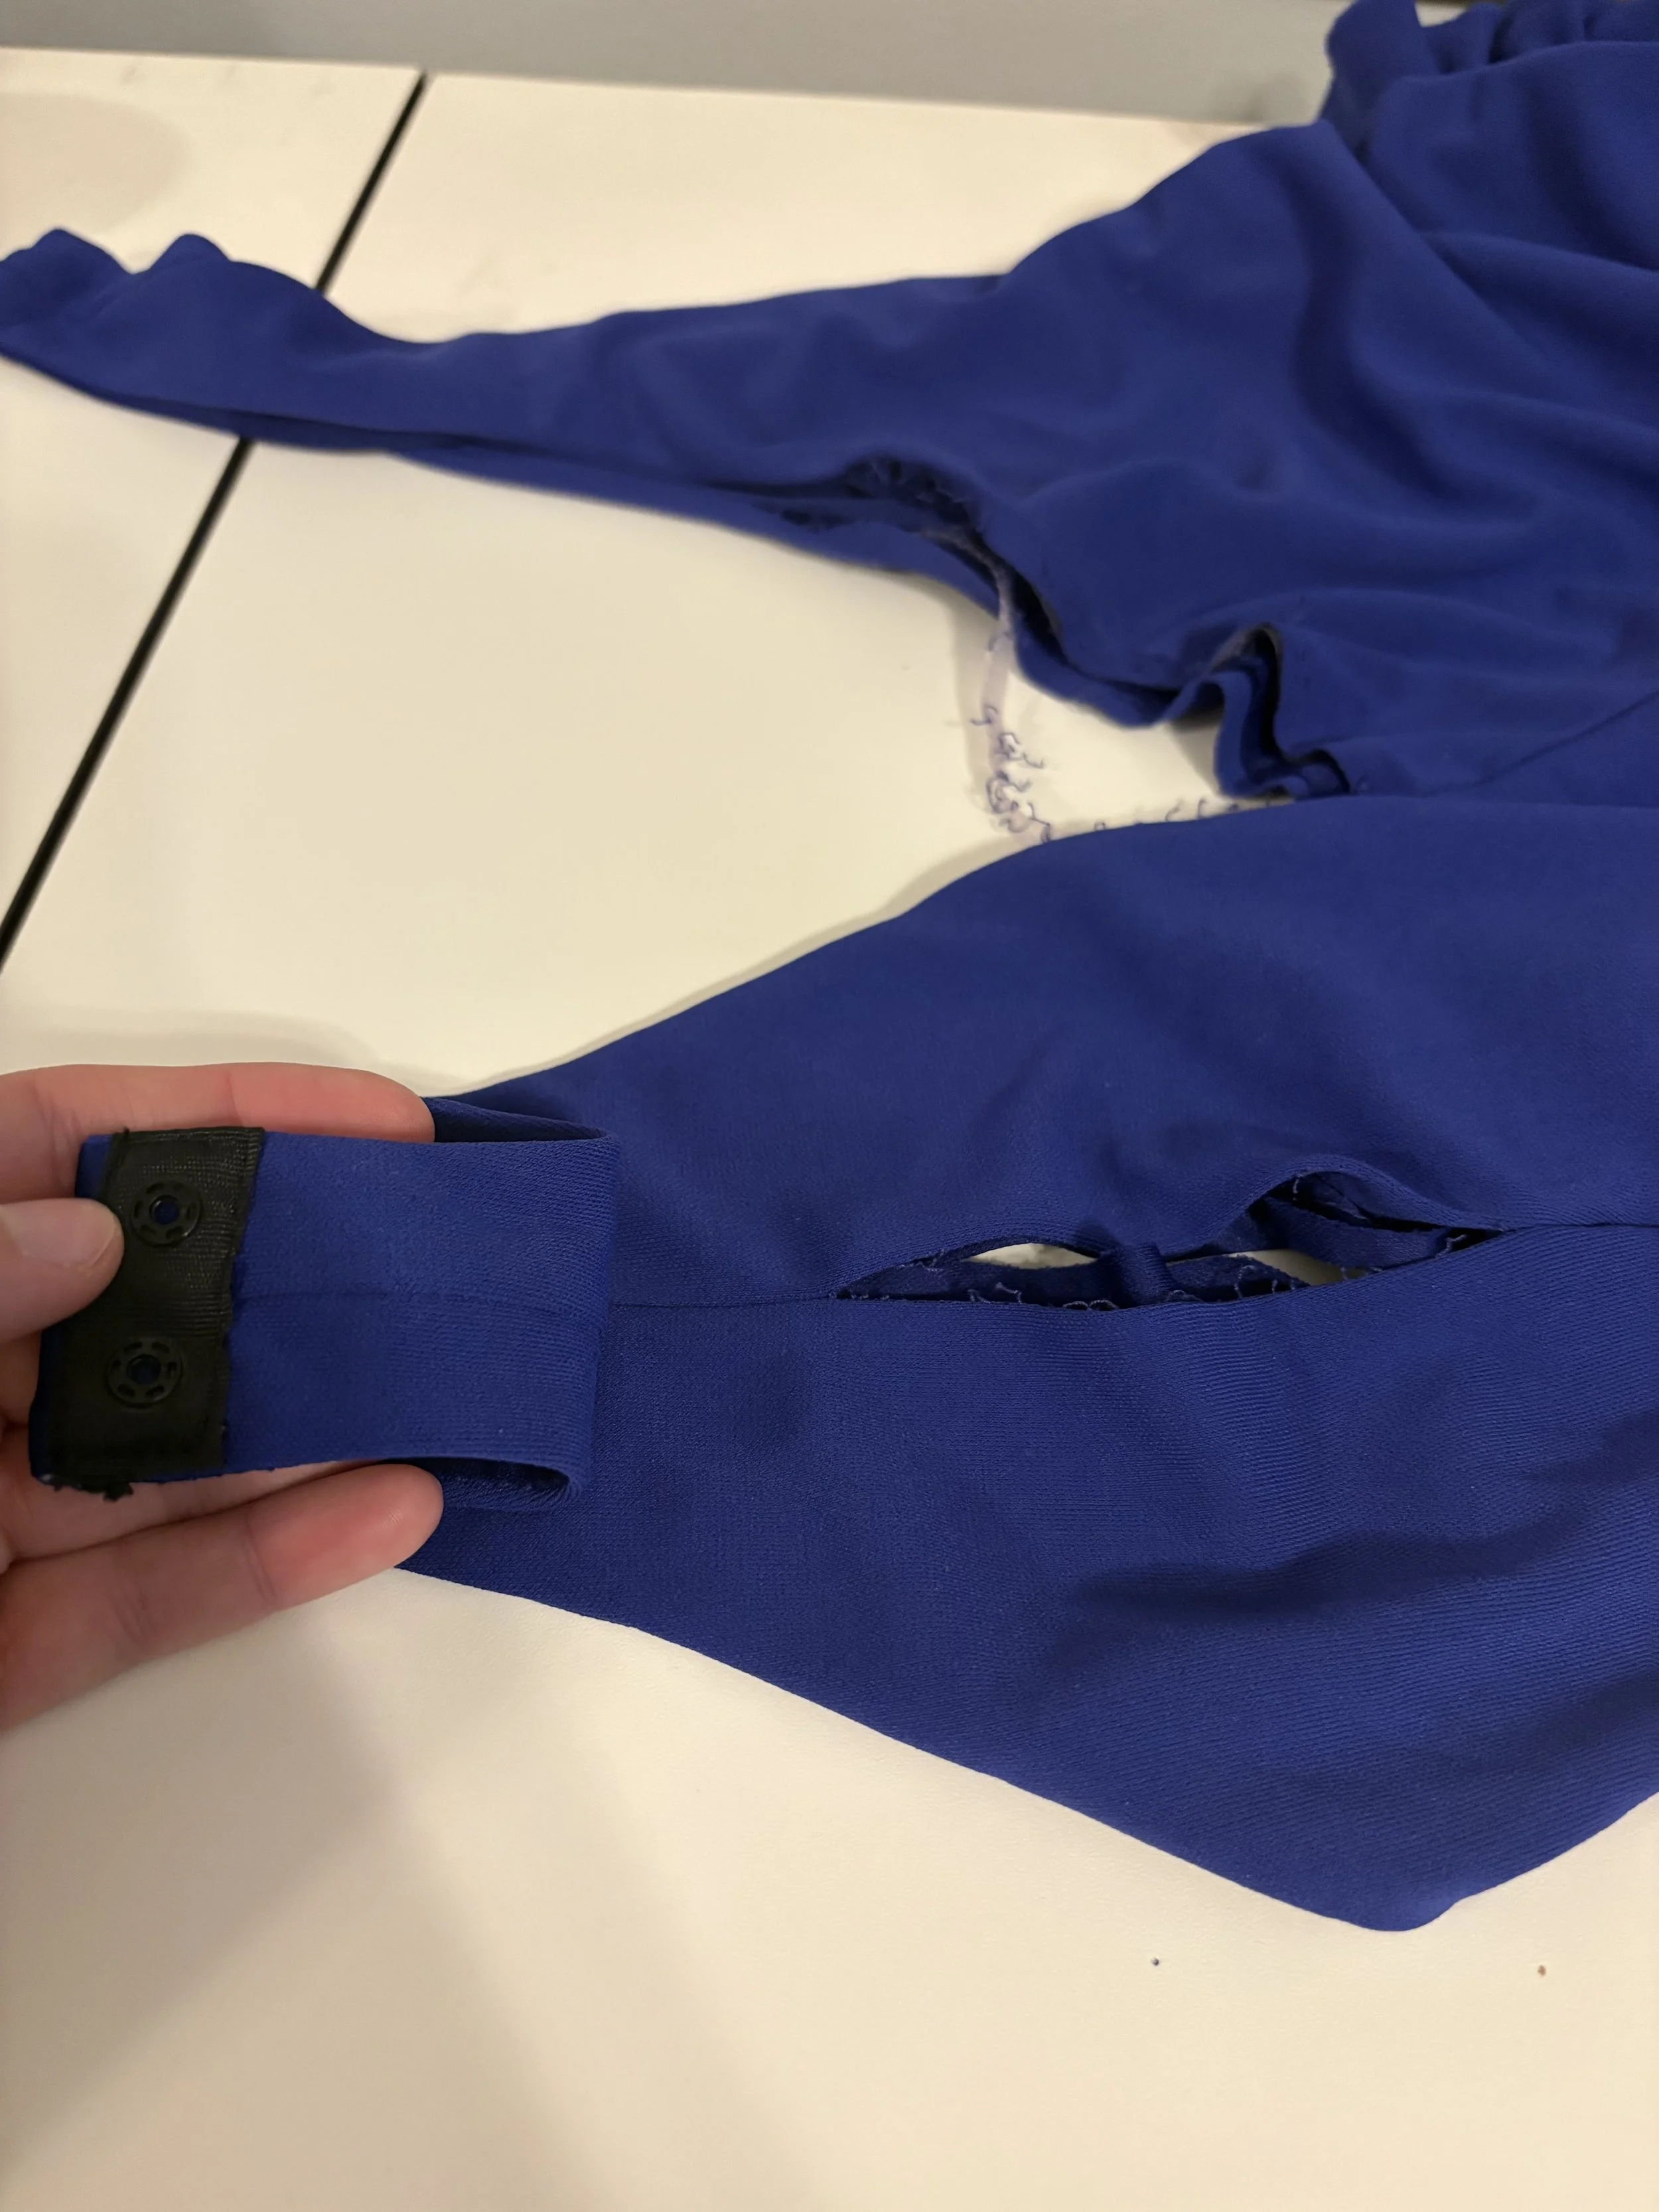
The first step with start with - outside of removing the spaghetti strap from the neckline - was seaming-ripping the hem/ leg-lines open…
This made it easier for me to taper the new sections of the hemline, while leaving enough material on the top in case my client later decides she wants to adjust the hem again.
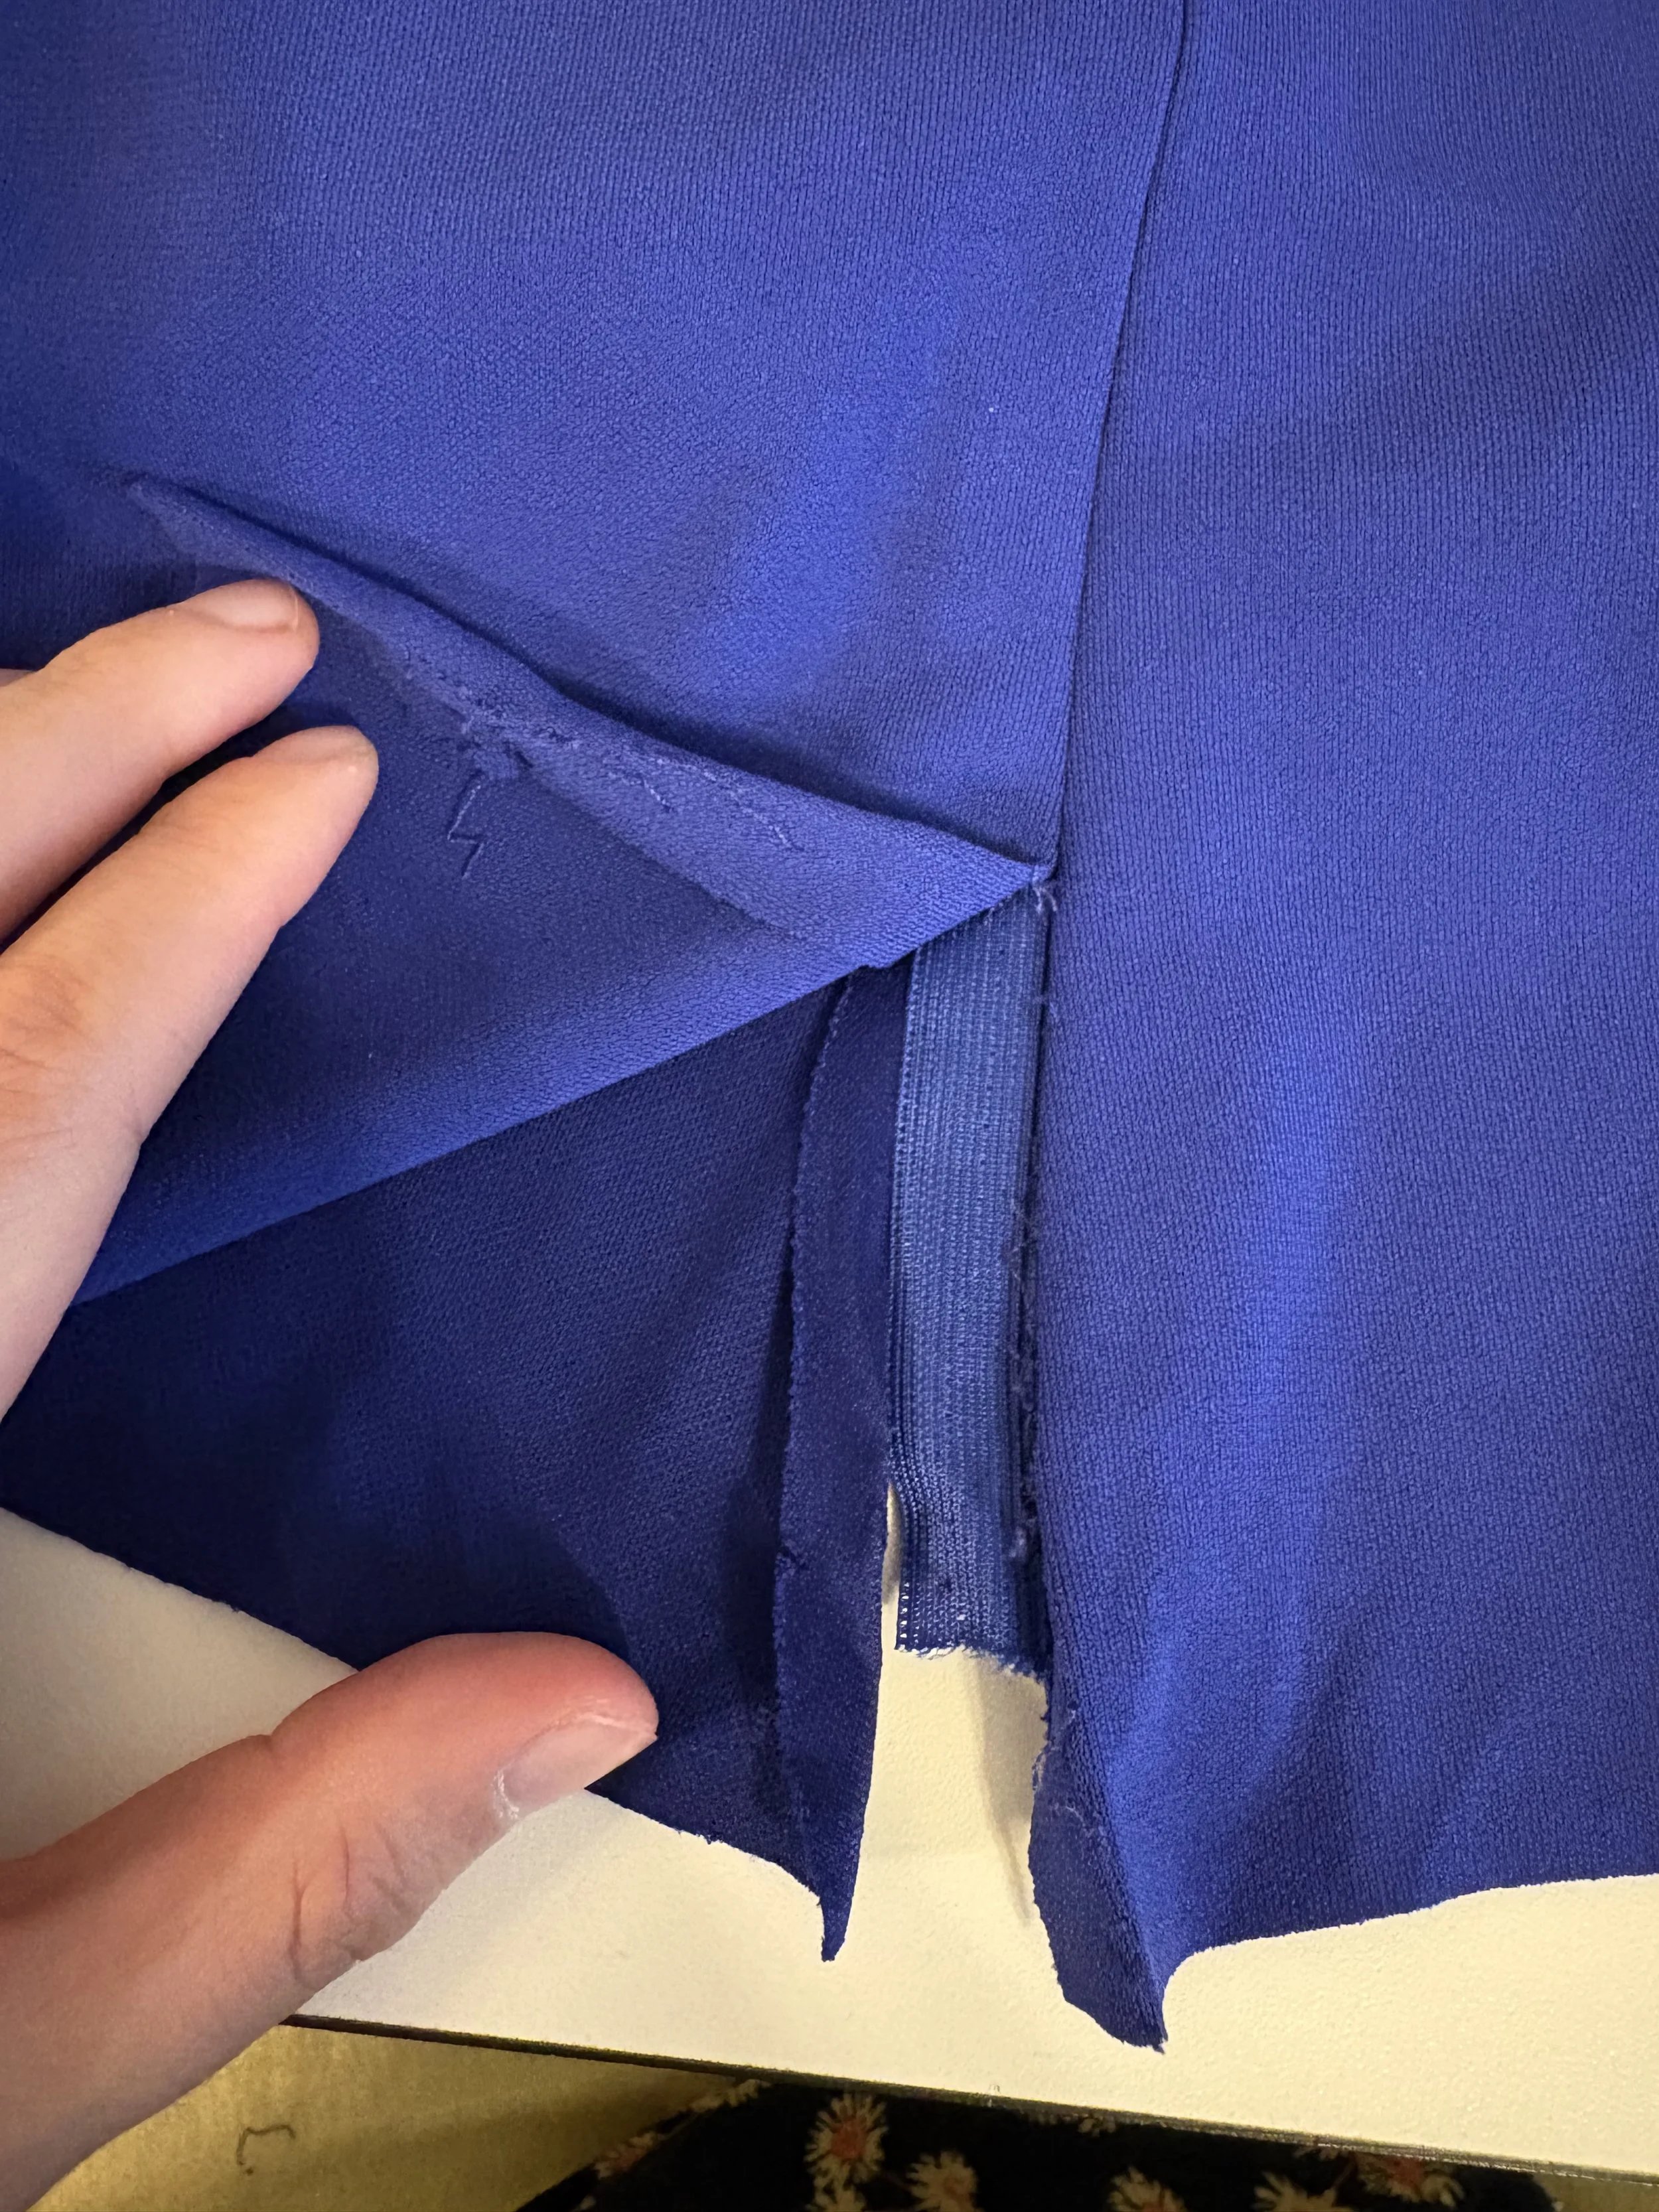
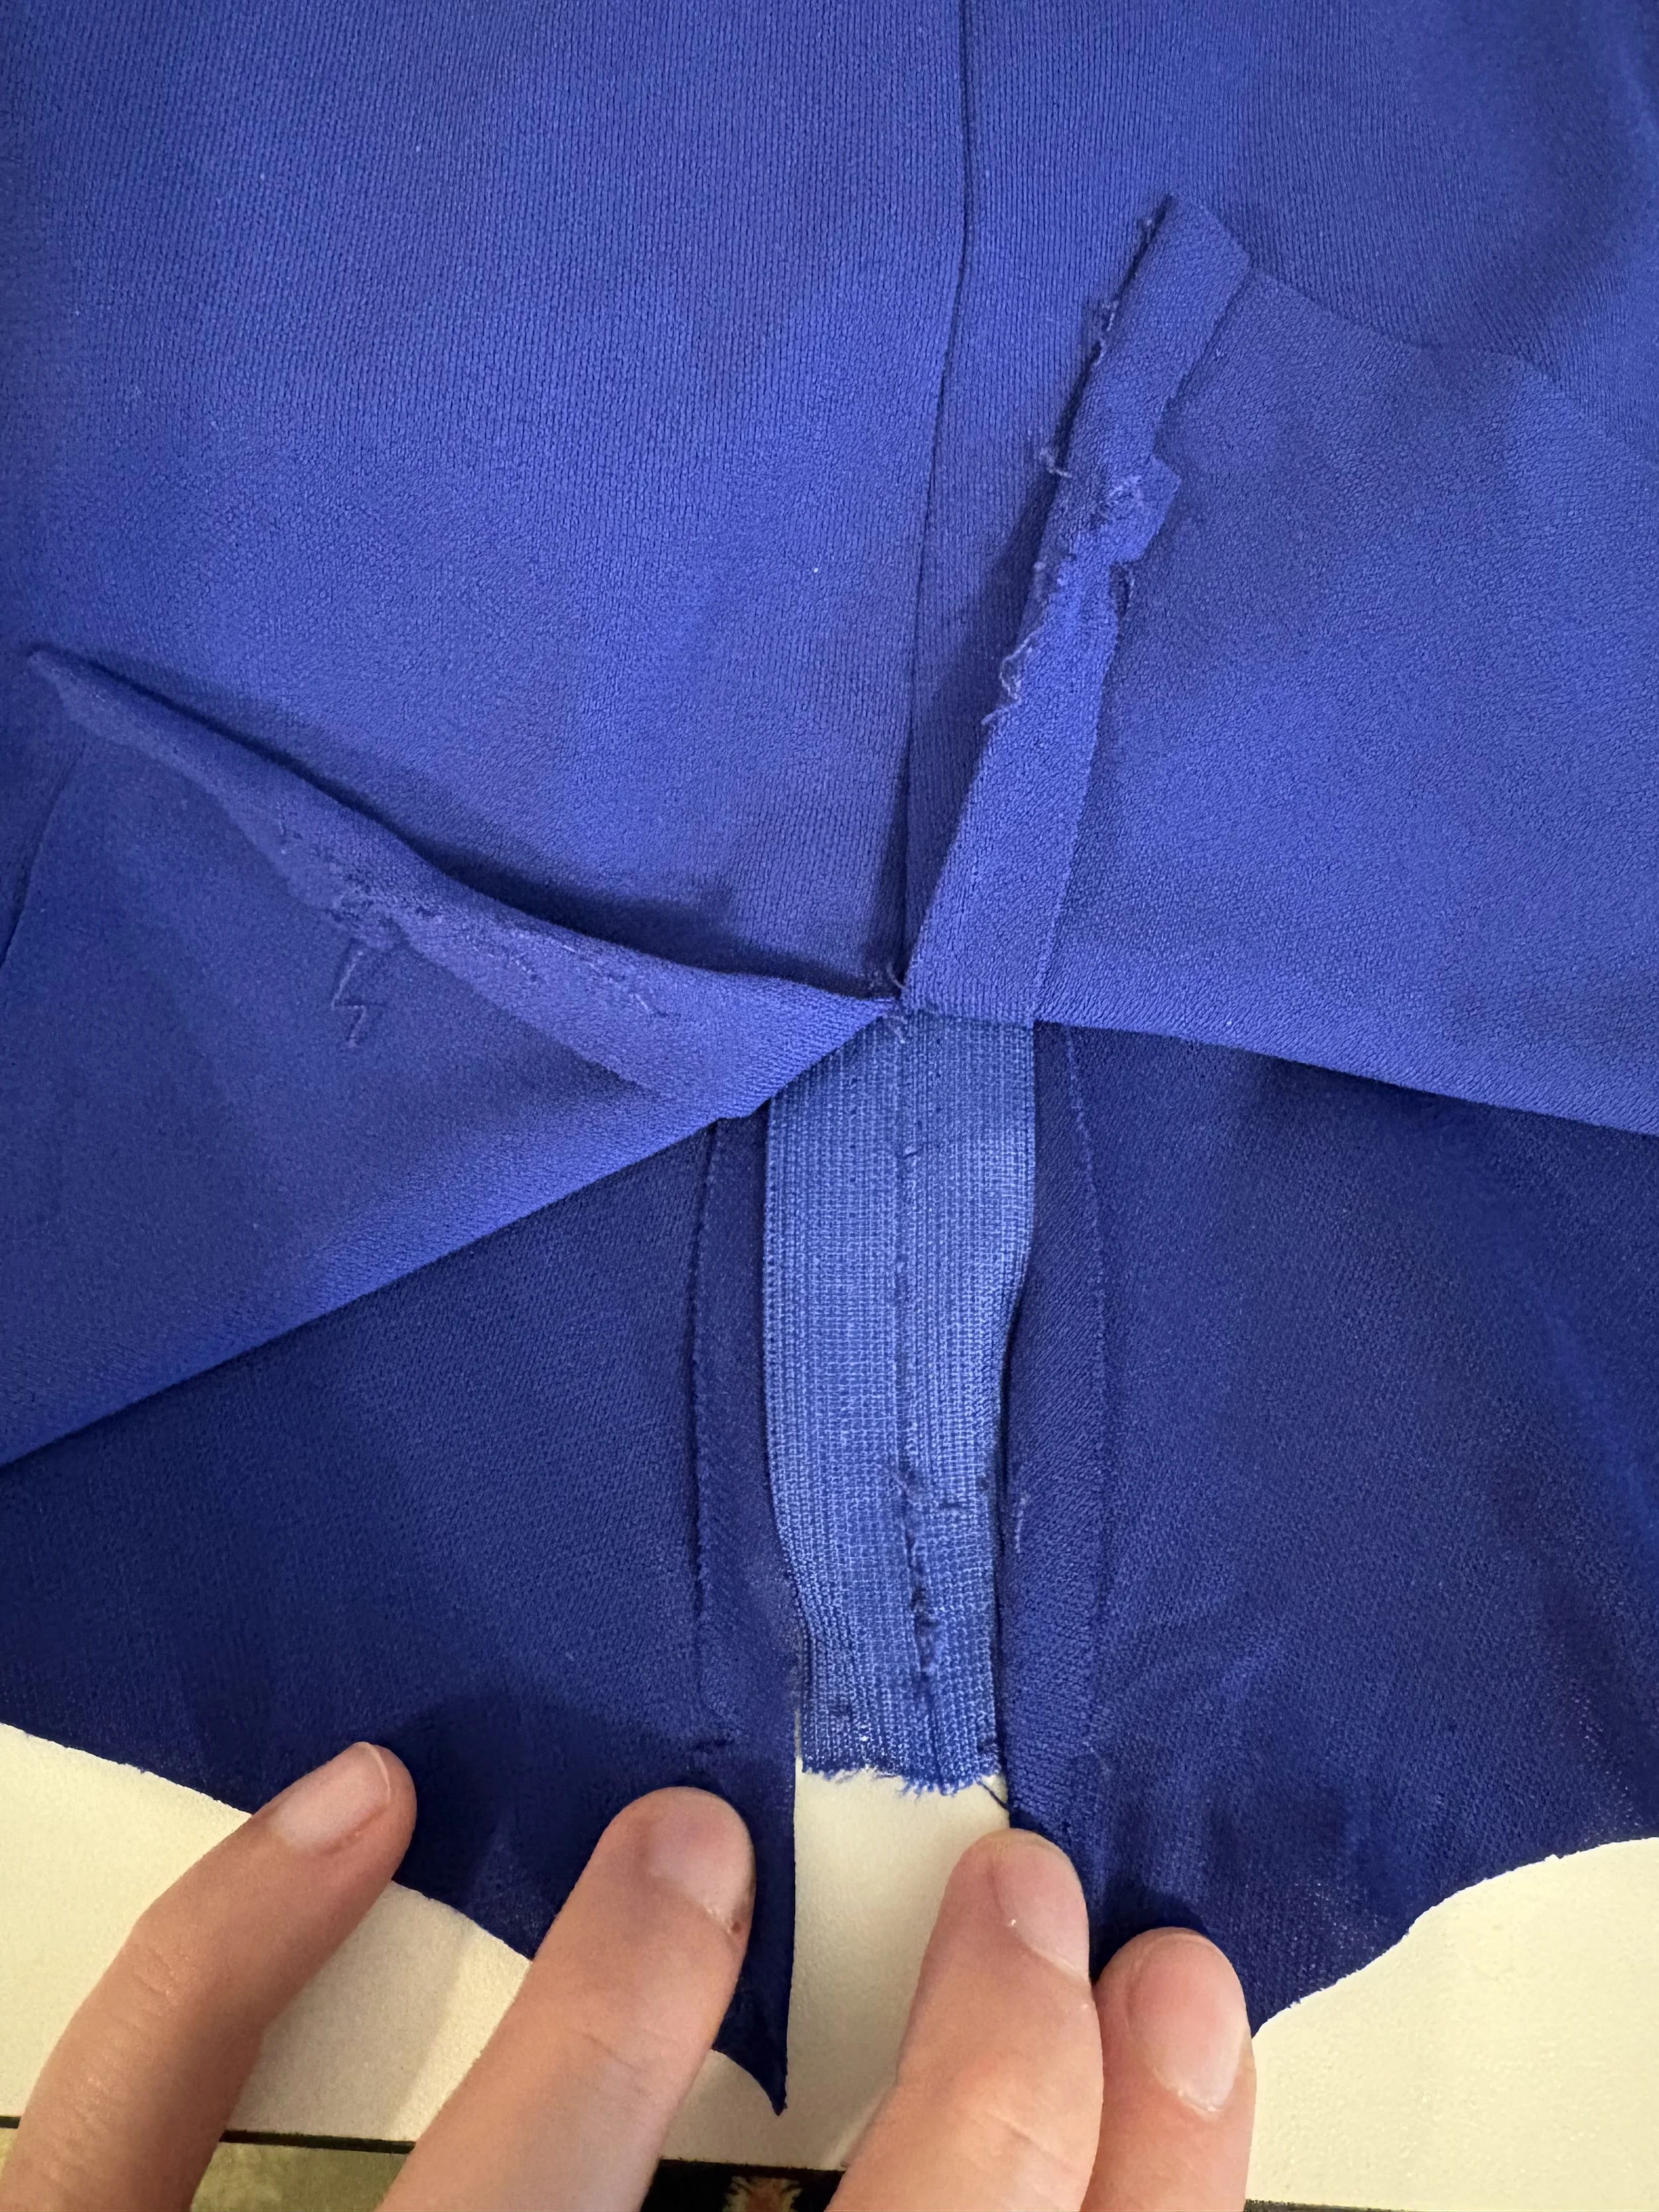
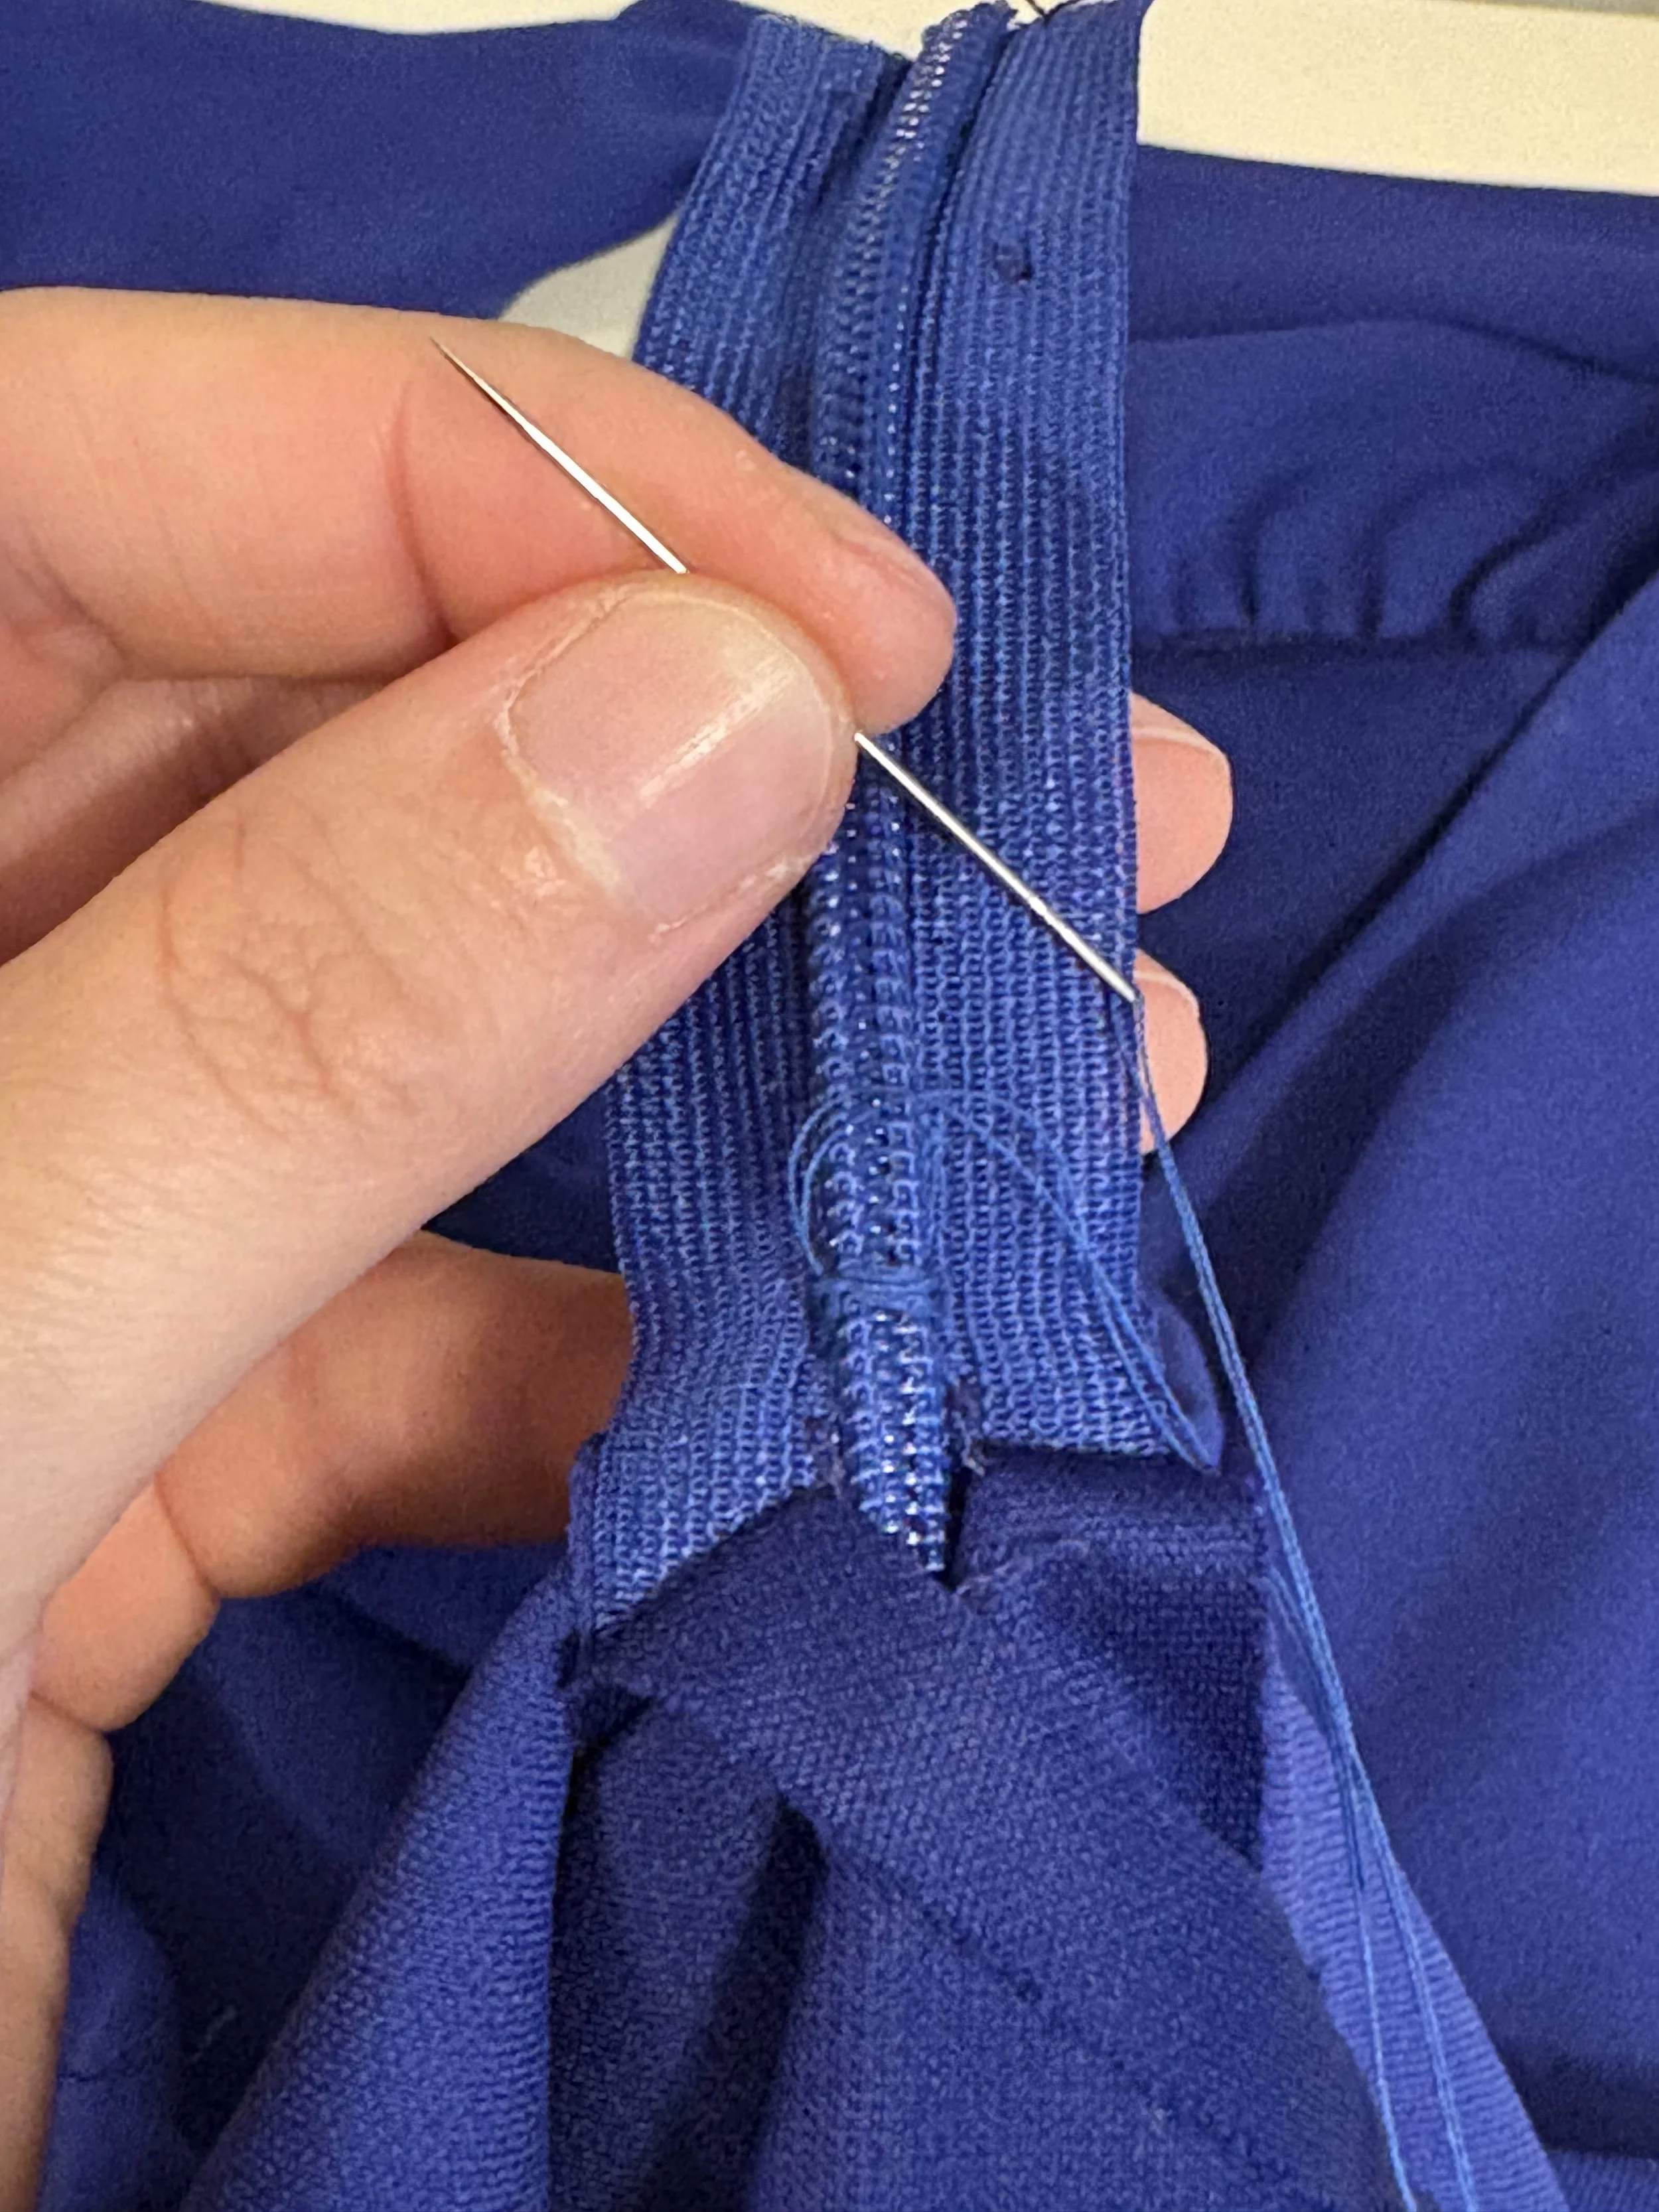
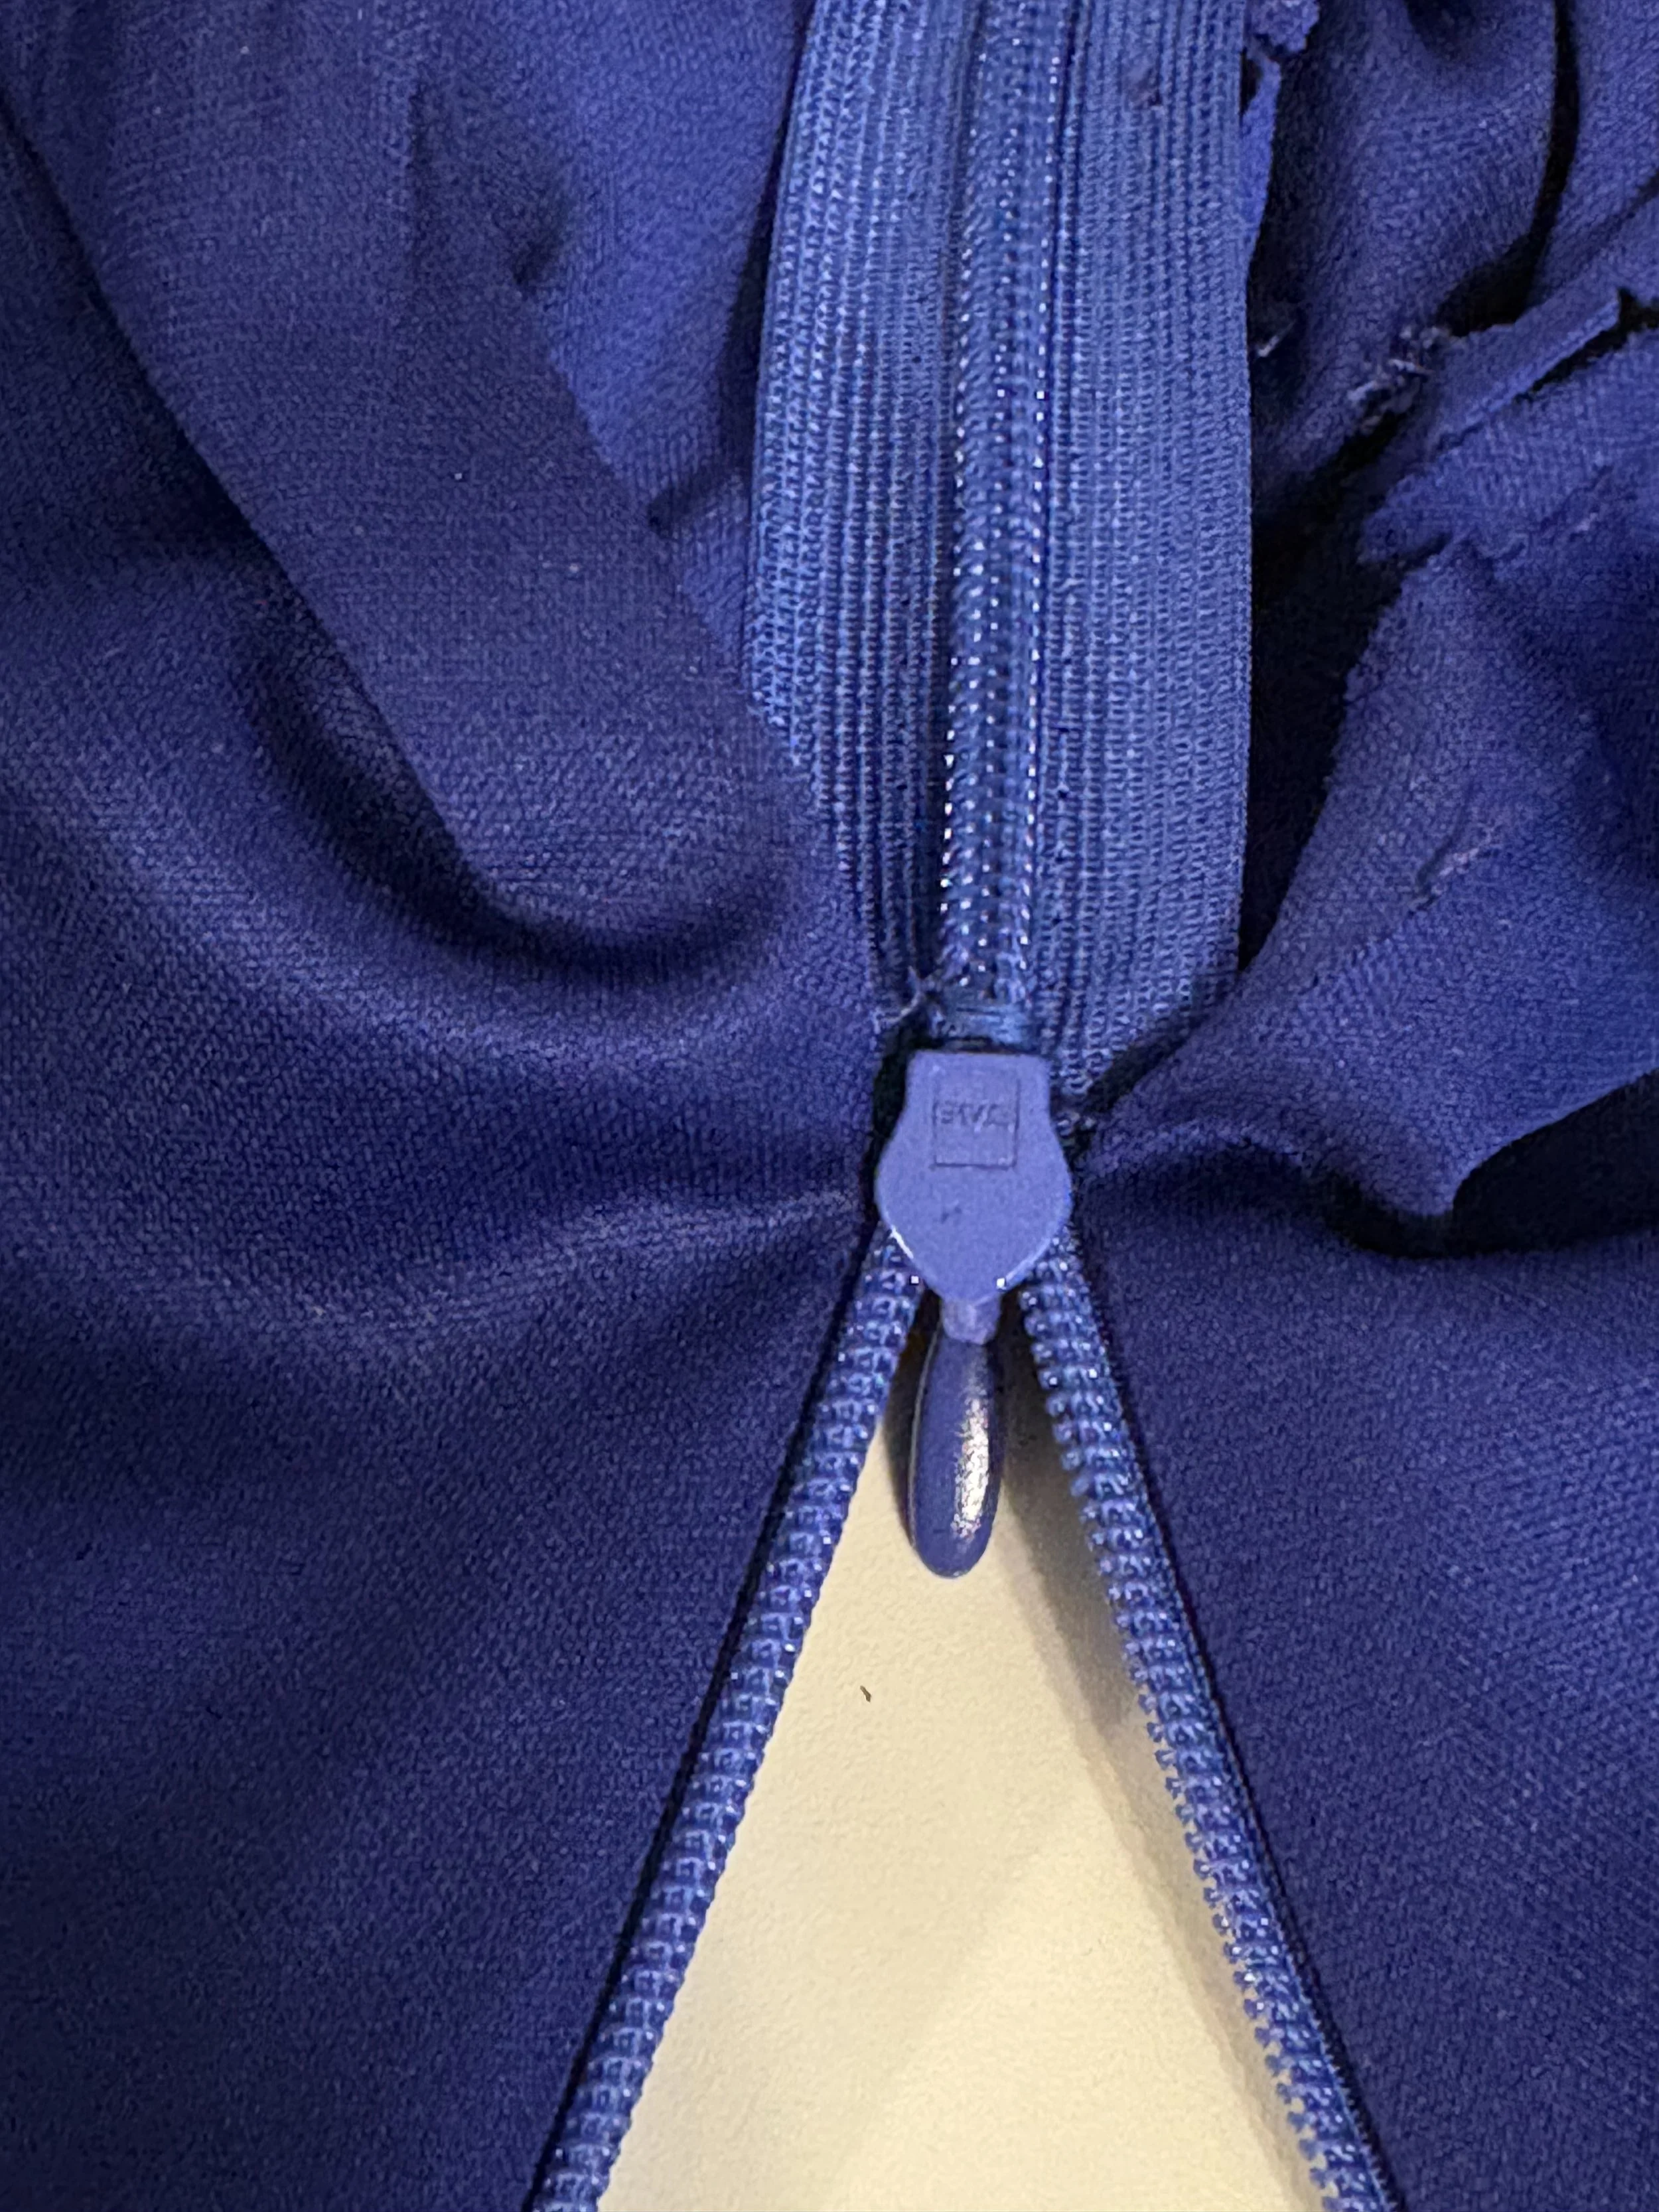
Once the seams were opened enough, I then went in and opened up the seams around the back zipper. Because of how much I needed to raise the new hemline, I thought it would be best to focused on the zipper first, as those alterations a little more finite: I can always use new material to extent the hemline in an “artistic way” (as long as it looks like a choice) - but once the zipper’s teeth are gone, they are gone… no replacement options.
For me personally, I prefer to anchor the zipper with a really thick 4-6 times-stitch over the zipper’s teeth (meaning I literally stitch over one point of the teeth, 4-6 times with matching thread); it usually leaves me enough of the zipper to cut away and the reset in the creases of the original seams.
(Sometimes, I sew just slightly past those creases create a more finished look - because it’s tricky to “repeat” those stitch patterns over the original creases… at least for this kind of material)
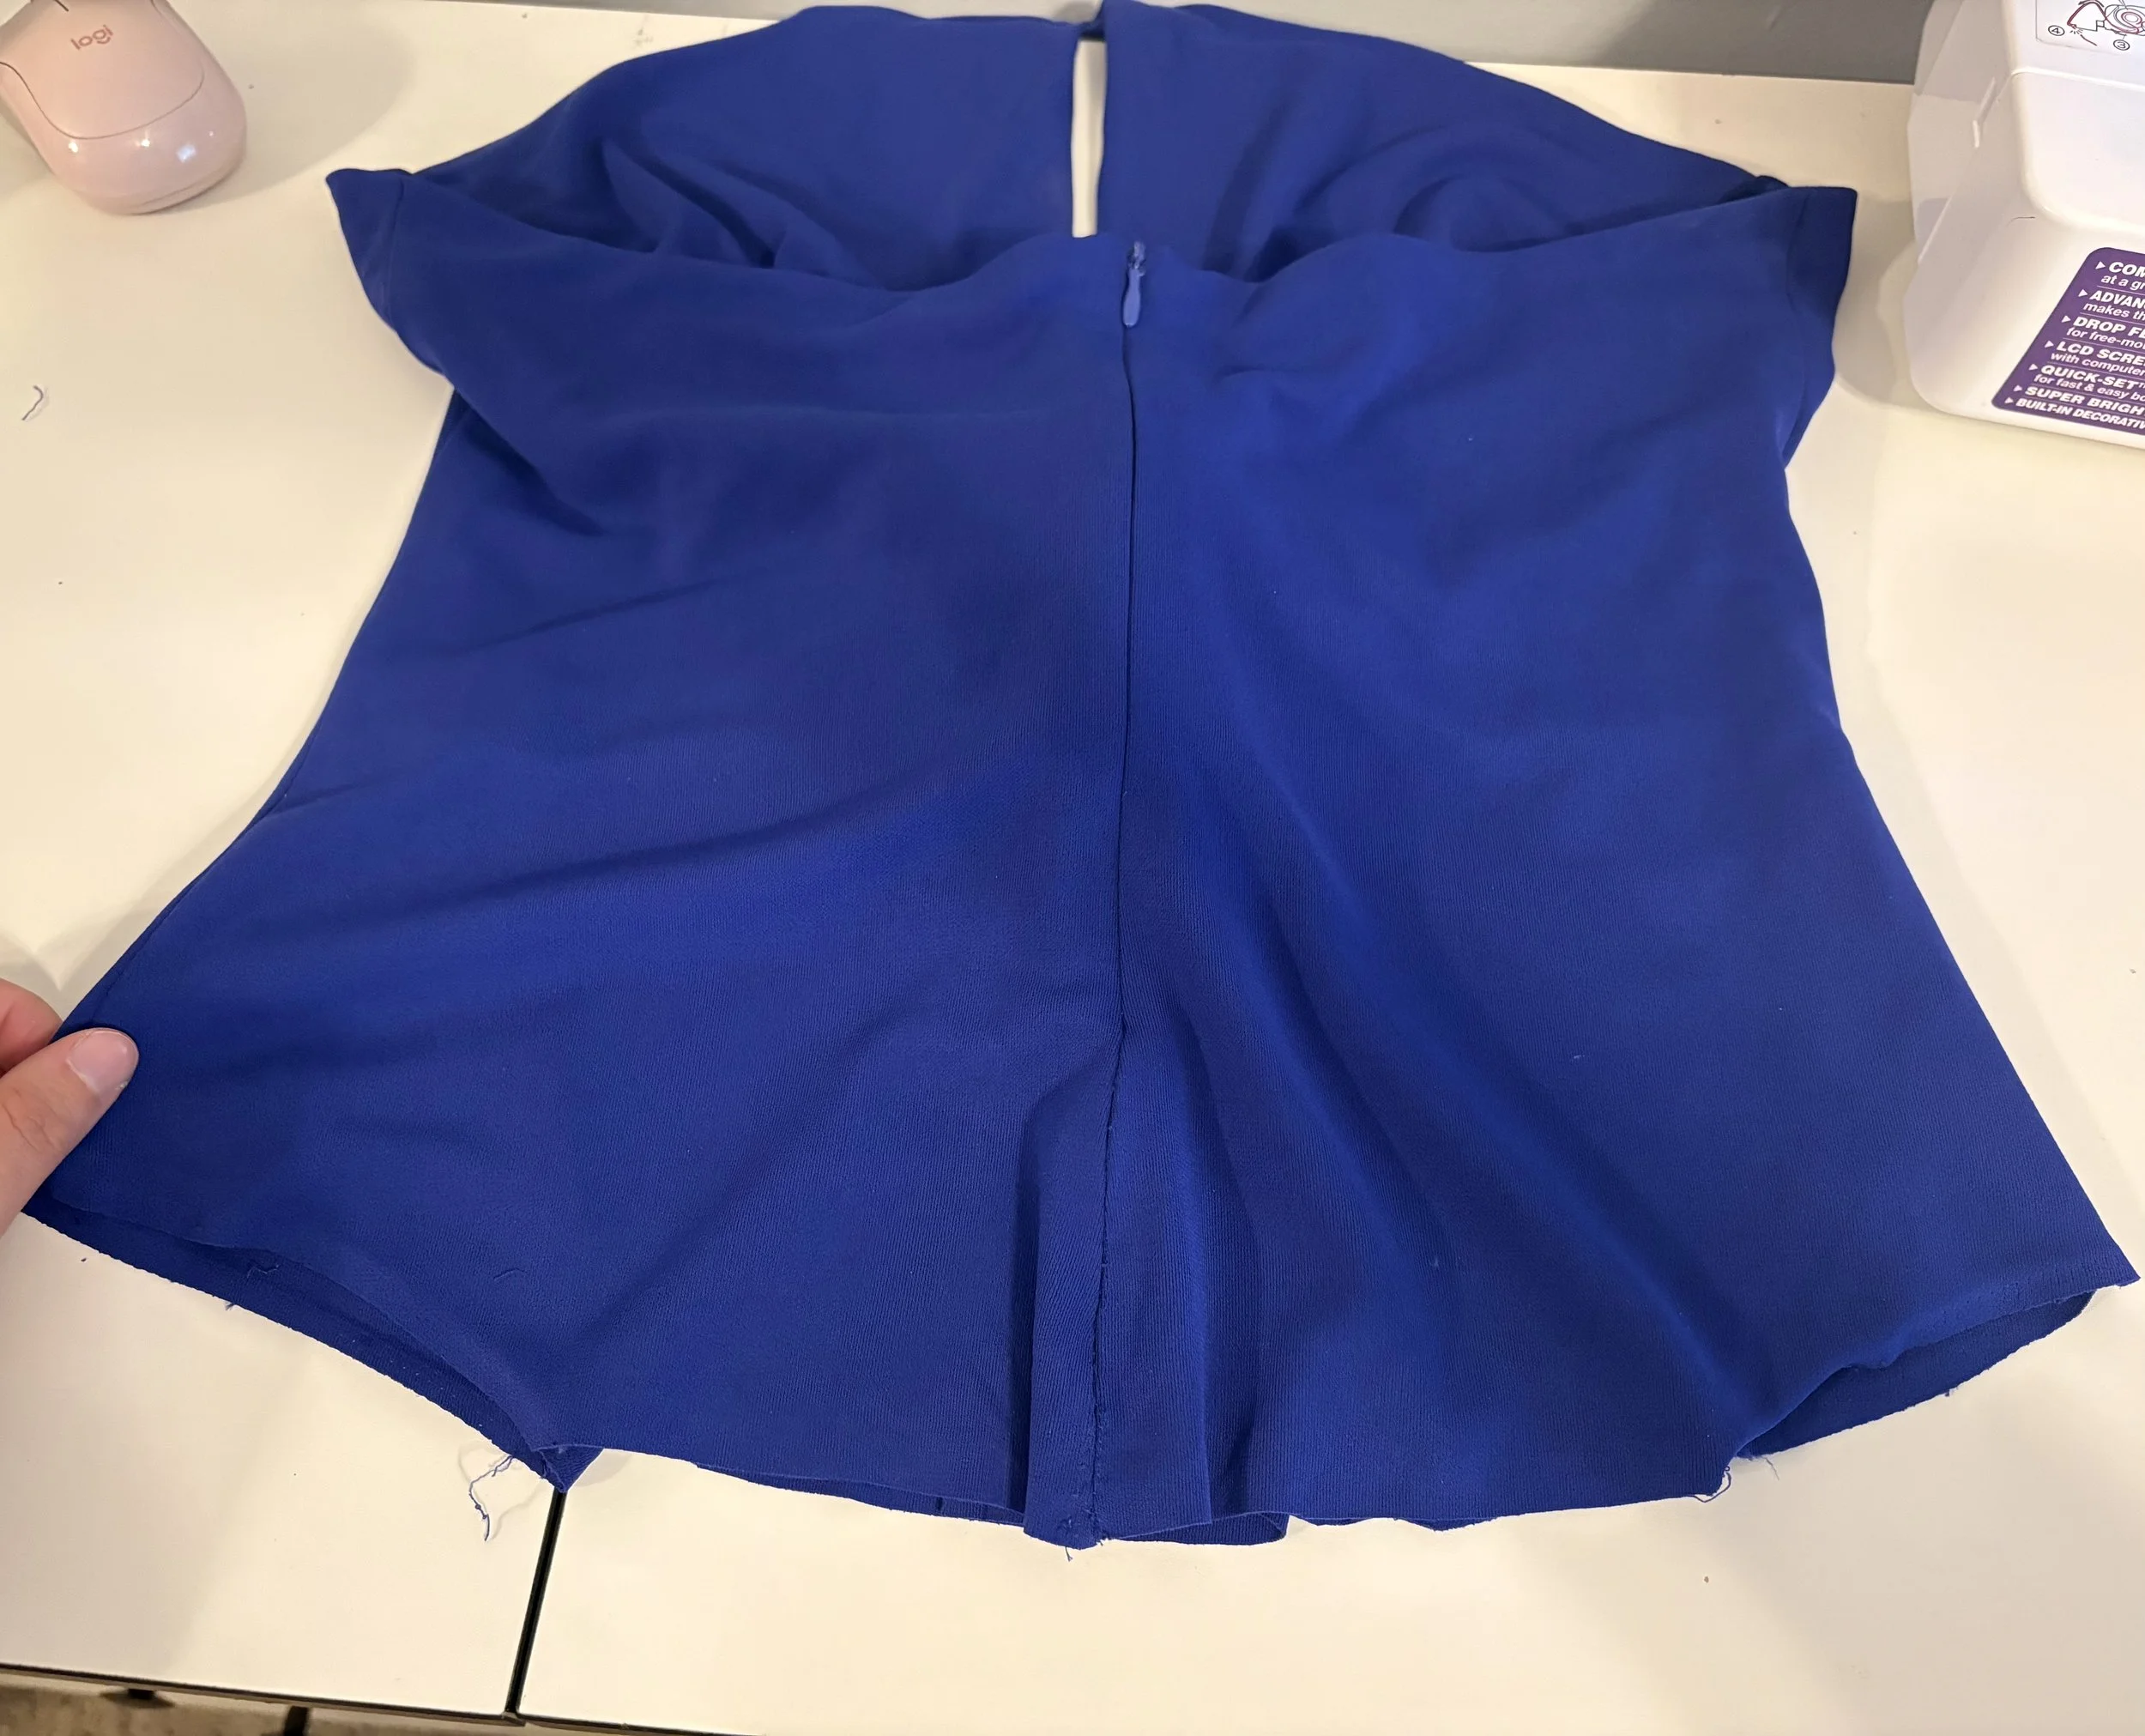
note how the top naturally curves once the “tails” are removed; opting leave the hemline “curvy” in this style will keep enough material on hand, in case my client later decides she wants to readjust the shape of the hem.
Once the zipper is anchored (and unable to accidentally slide off of the teeth!), I went ahead and stitched up the free seams of the zipper - and usually by hand! I’ve tried it both ways - by sewing machine and by hand - and I just feel like re-seaming them by hand creates a more flawless finish;
I have more control over the tension of my thread, and can better see where the original lines were.
The new hem of the top absolutely proved to be the trickiest part of the alterations (as I suspected it could be).
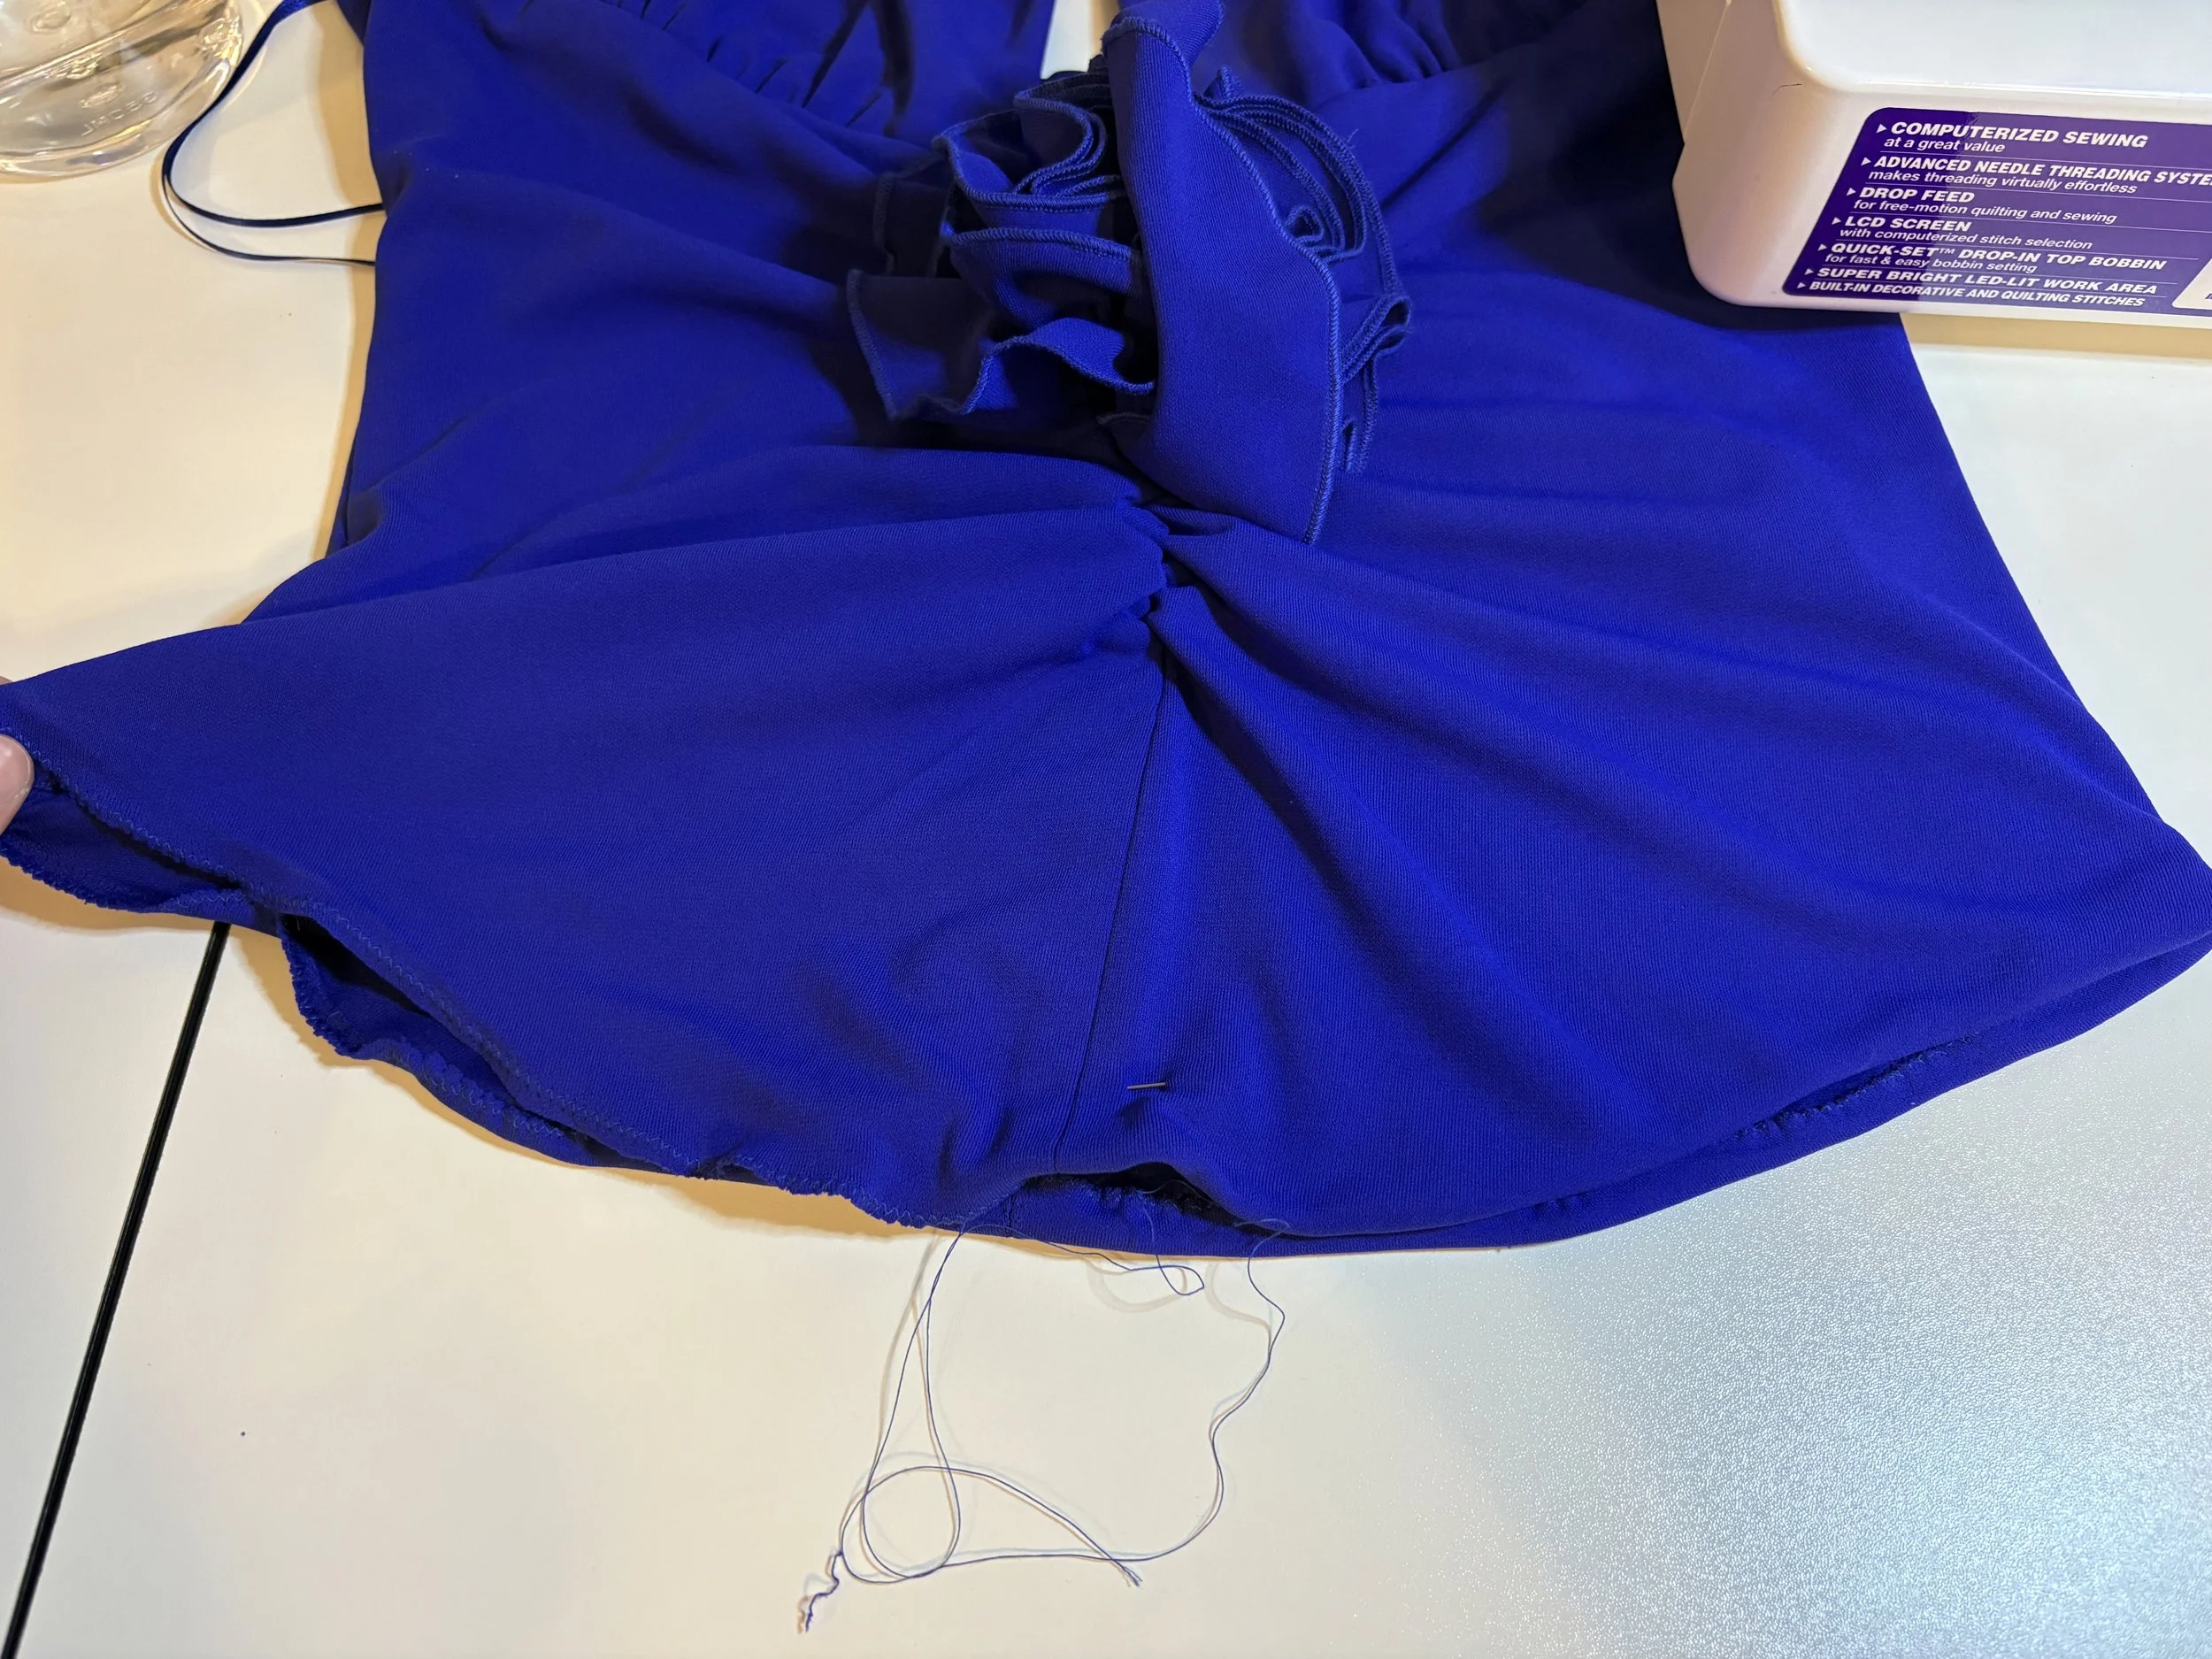
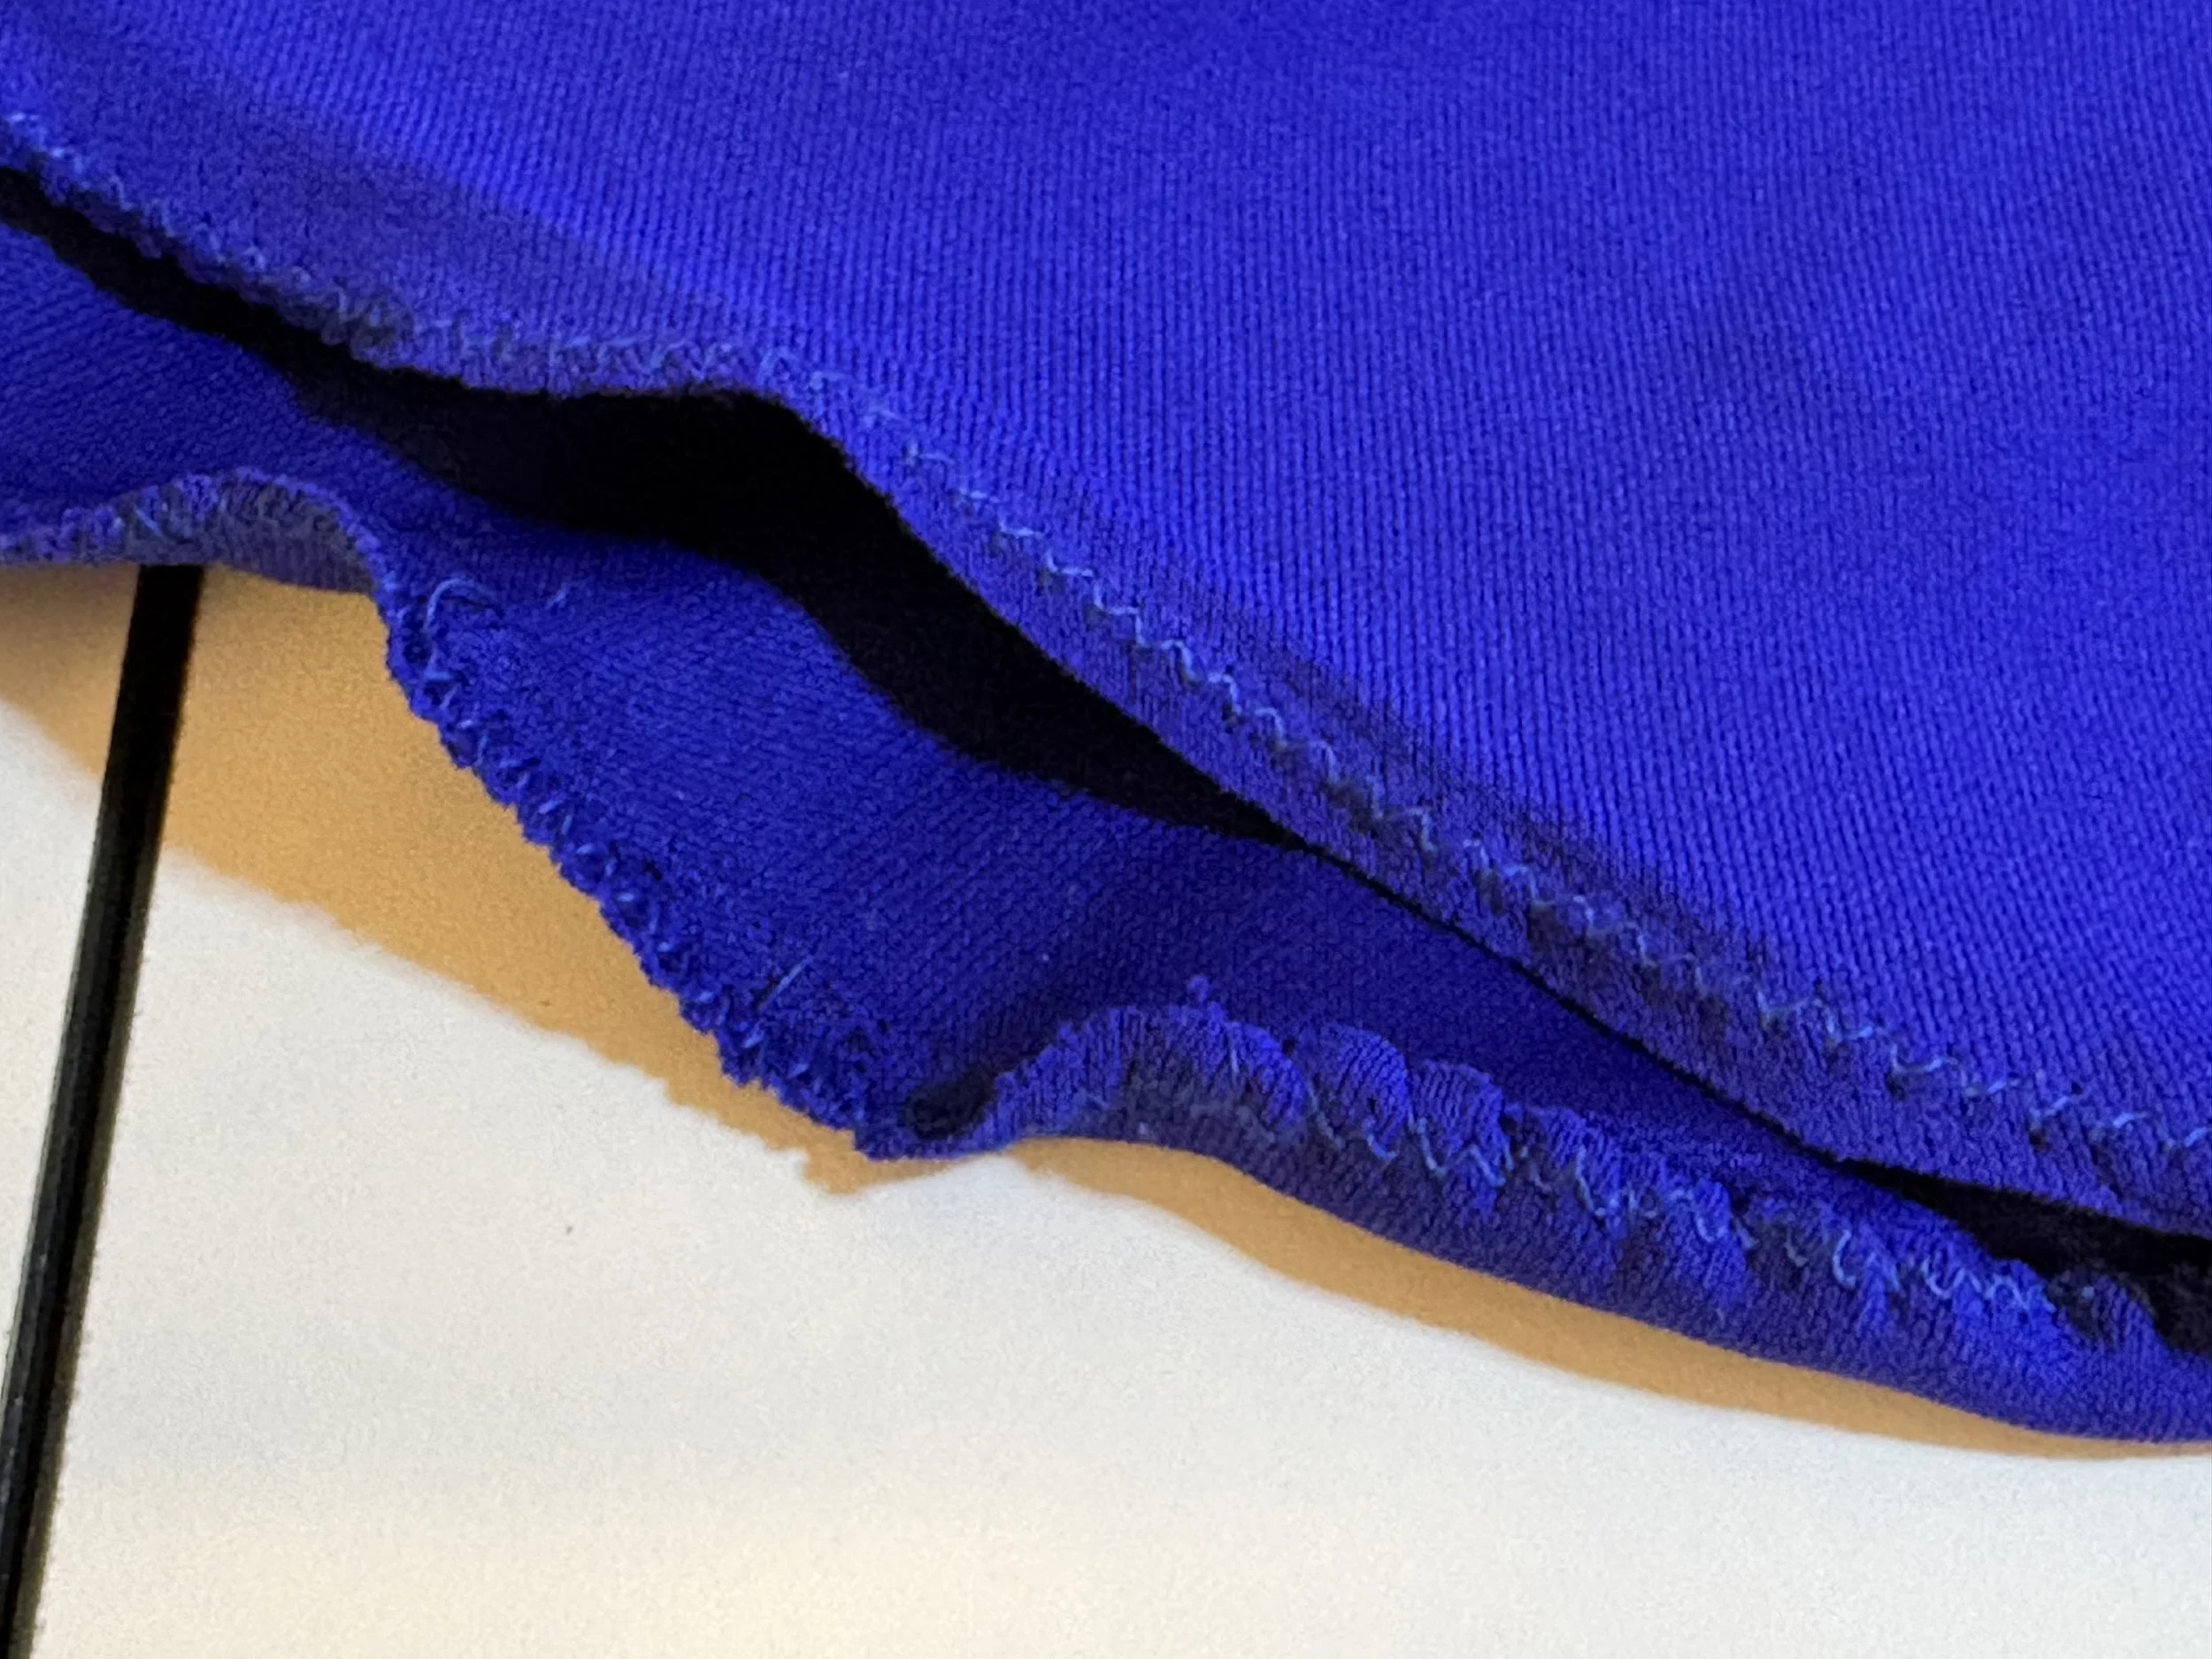
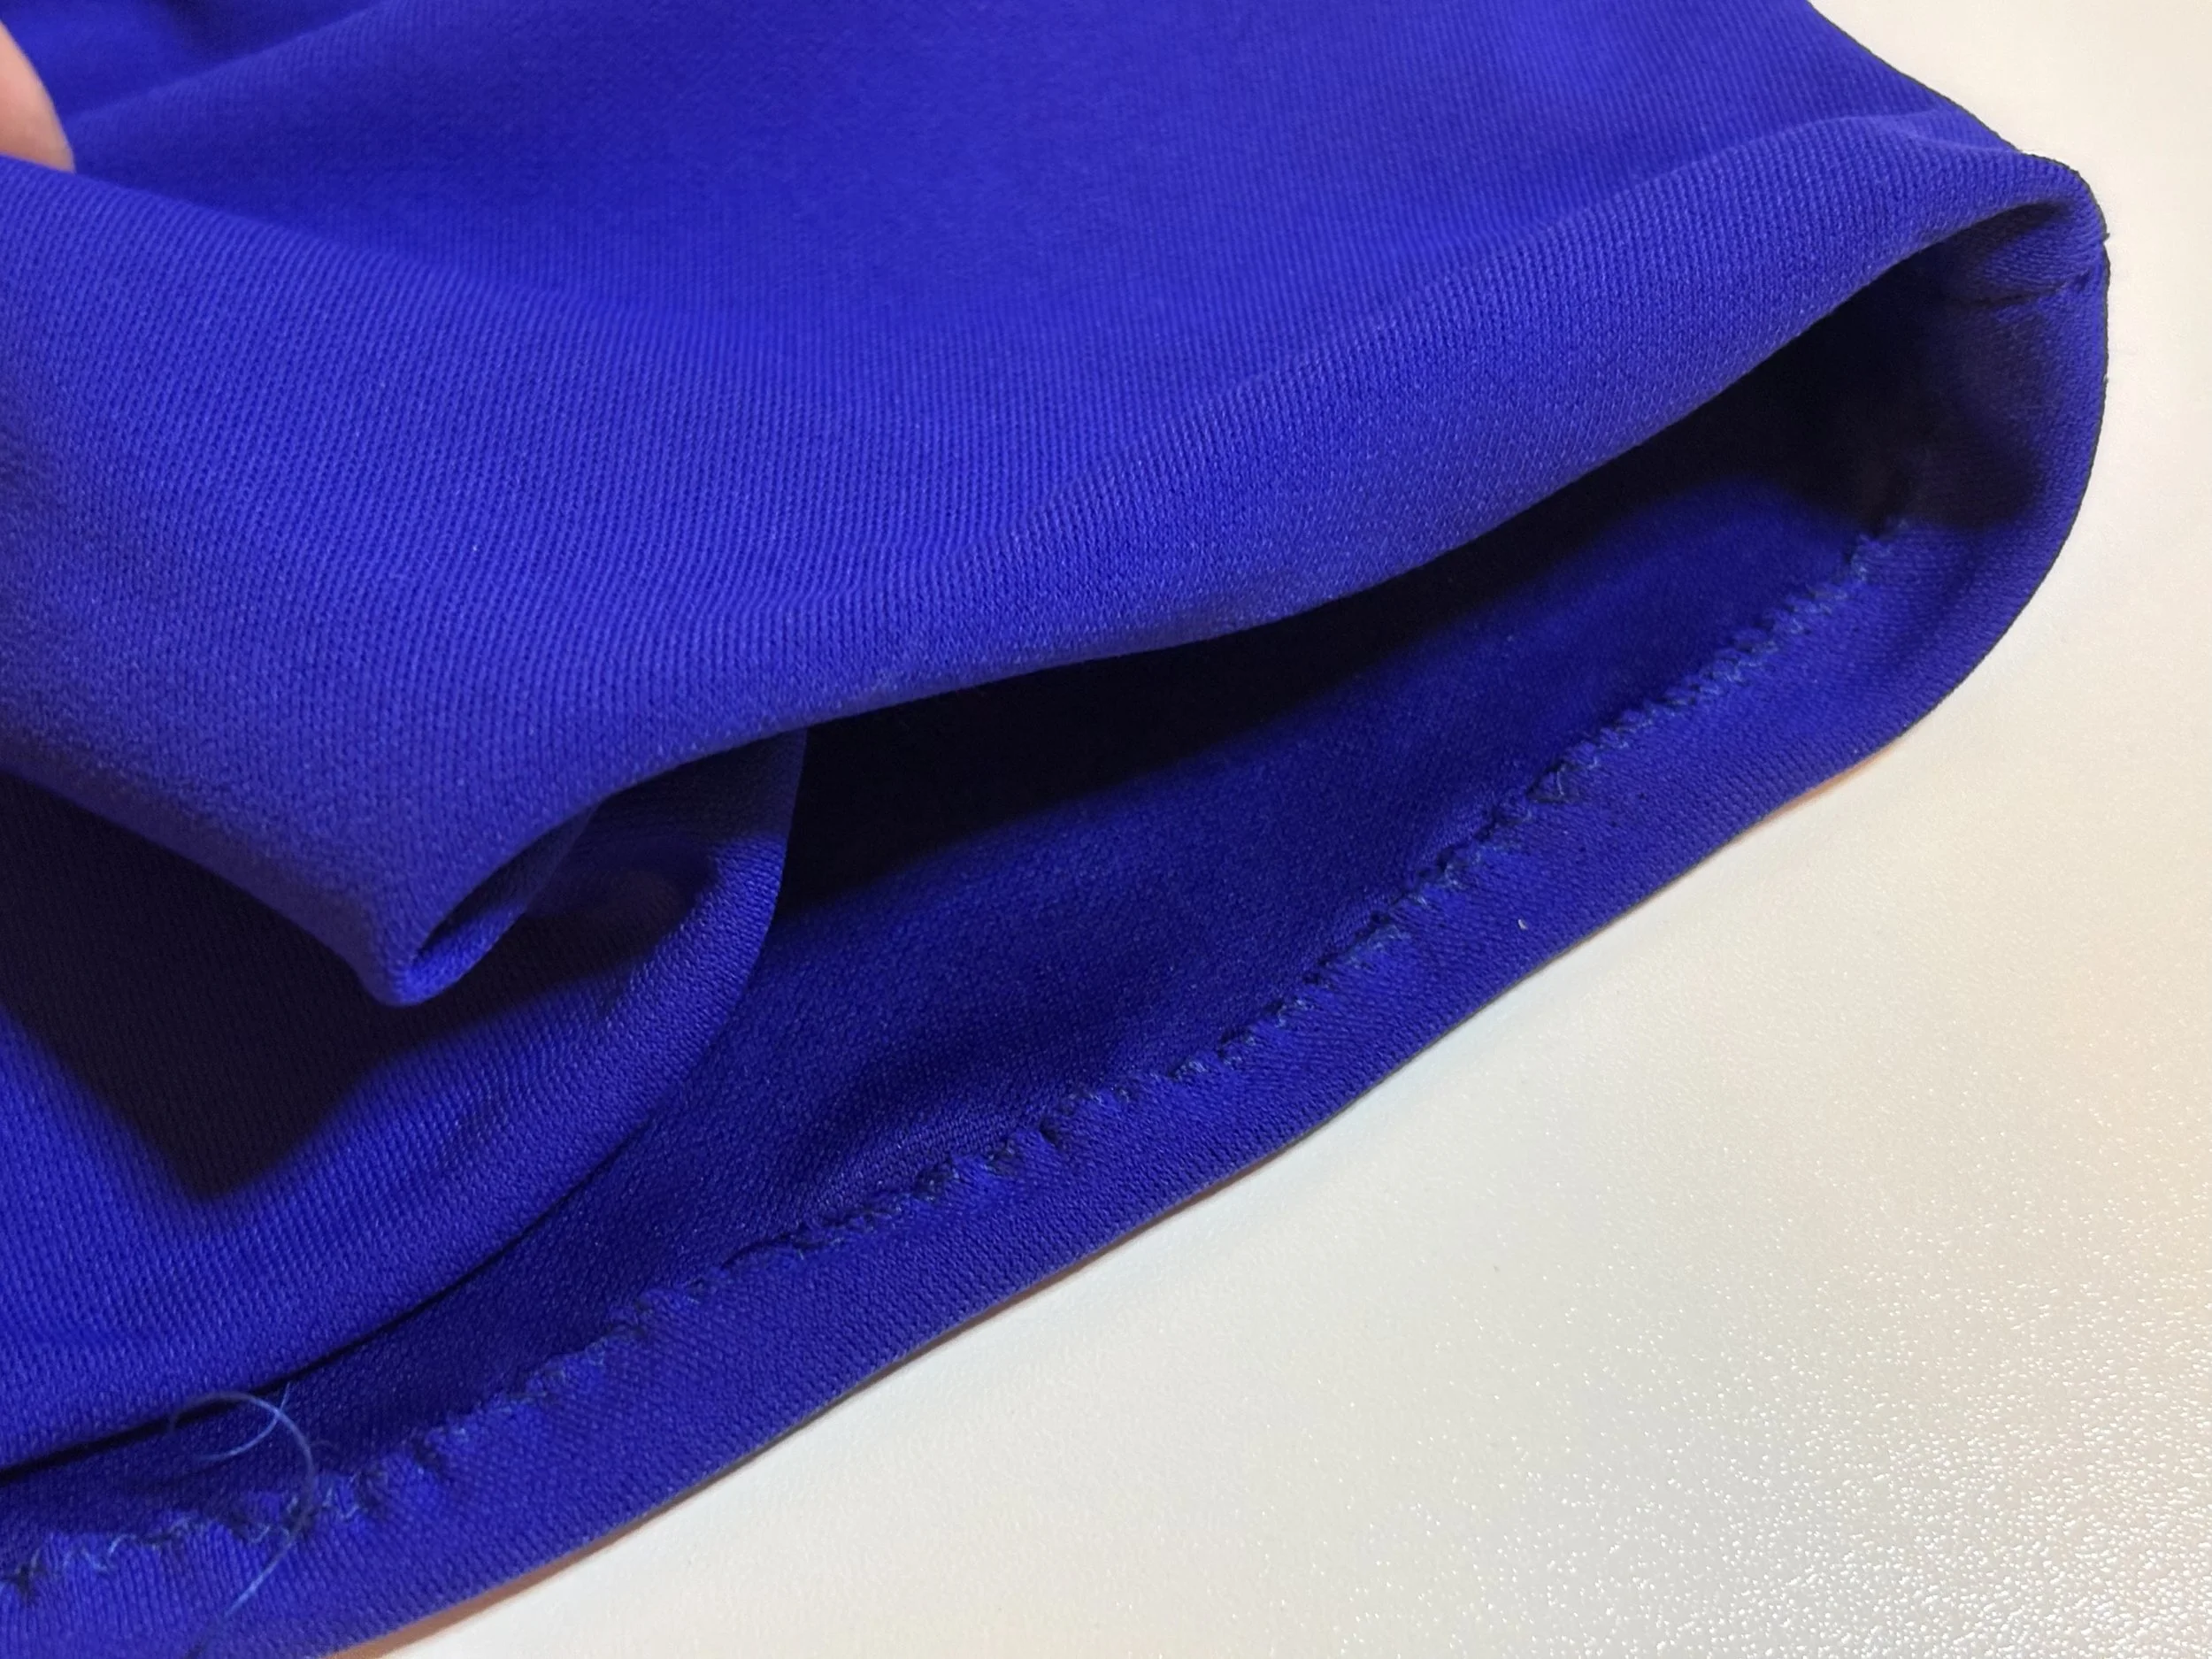
Because of the way the body-suit was constructed, the lining material (yes, there was lining) ended up being a tad shorter than the outer shell of the top. This creates a slight gap in space between the two layers of fabric which makes it trickier lining them up perfectly. On top of that, I didn’t want to run the risk of making the hemline too short, so evening the pieces to the same length wasn’t an option.
The solution here was to clean up the rougher edges from where there tails were removed.
Then, I stitched the raw edges of the fabrics together via a tight zigzag stitch; at first I tried skipping this step by stitching them together with a small invisible seam… but this attempt quickly fell apart on me when I realized sewing this material felt like sewing water. I just could NOT get a good and steady hand going for comfortable and efficient sewing.
After the raw edges were connected, I ended up whip-stitching the edges to create a more seamless finish on the outside. Because this material should never be ironed, it was the only way I could make the hem “fall flat” by taking away some of the bulk.
But as you can see, it didn’t exactly create the same smooth finish on the inside of the top…
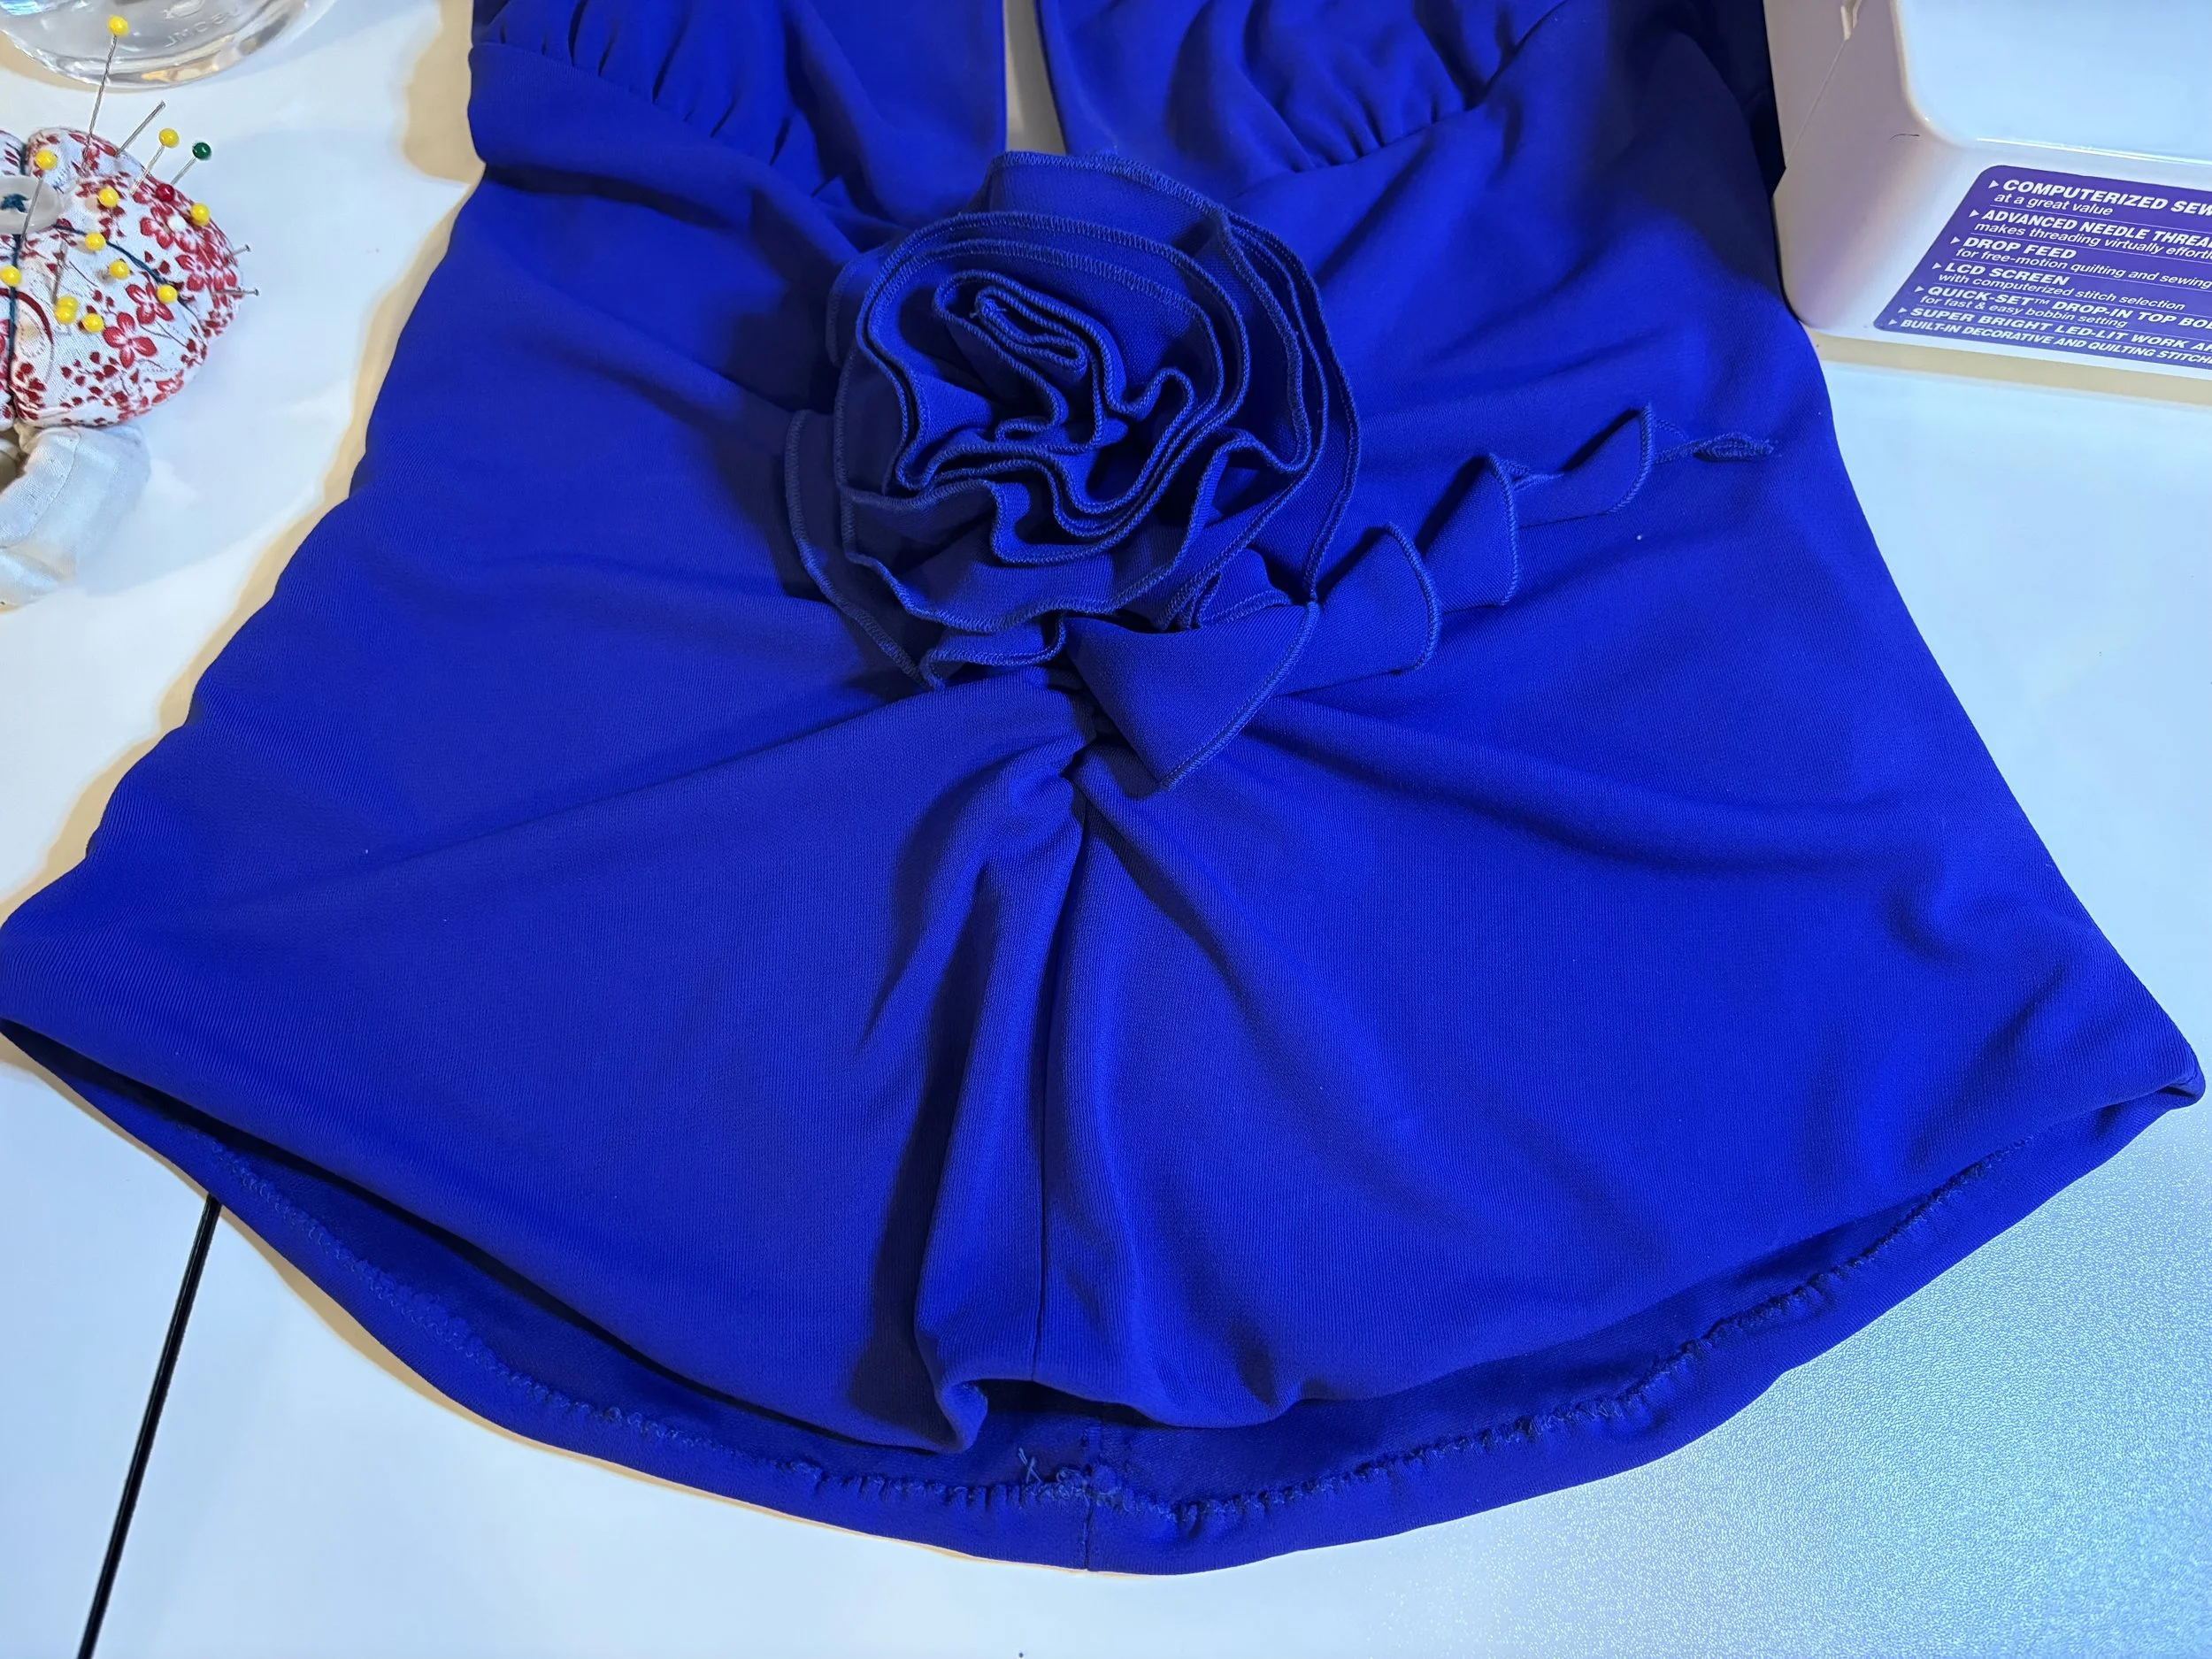
around the center front and back seams was where I struggled the most; and because this fabric was like sewing water, the struggle of measuring-pinning-and-re-pinning was very much real!
However, if I did my job right then these rougher parts of sewing won’t even be visible when the top is being worn. And because of how tight the stitch work is spaced, I dare this hem to come undone in the wash… or anywhere!
(This stitching will outlast a nuclear holocaust, if I may say so myself)
I managed to get this top done in relatively little time (along with a few other quick fixes she dropped off). Altogether, I think I spent roughly 2 hours on this refashion, from start to finish. Though what I do think helped a lot on saving time, is the fact that my client has such a slight build to begin with.
Not to be size-ist, but in my experience certain clothes just hang differently on different body types - and with more petite bodies there is generally less structuring for minor refashions (generally, but not always).
If I were going to complete this type of re-fashioning for myself, for example, I would have to come up with a few creative solutions for extending both the neckline and the hem (the women in my family are decently “well-endowed” if you catch my drift).
And personally, I think I would’ve actually removed the zipper for my body type, just because restructuring the neckline would mean creating a brand new access point via the neck.
(But keep in mind this is just a reflective thought-exercise on my part; it helps me consider the cut of a specific garment from multiple perspectives)
Ultimately, I’m really pleased with how this refashioning turned out. Partly because it was surprisingly simple, and because it was the first one I ever got to do for someone other than myself!