traditional Crochet Rose
So, ever since I was a little girl I was obsessed with learning how to make fabric flowers. And I mean OBSESSED! I don’t really remember why anymore, though I think it had a lot to do with wanting to have a garden everywhere (again, for reasons I don’t fully remember or understand in my adult-life).
And one of the first flowers I learned how to make was the traditional wrap-around rose (I use the term “wrap-around” because it helps me separate it from the other rose motifs I’ve since learned… there are a lot of them!).
For students who are ready to take their crochet-game up a notch, this is the rose pattern I recommend trying out first. There are fewer working parts to keep up with compared to other versions, which makes it a little less tedious - and much less frustrating. Bear in mind, though, you’ll be learning to crochet 3-dimensional shapes with this motif and that can feel daunting for beginners. Just remember to take your time and you’ll be just fine.
Materials:
For larger flowers:
size I/9 crochet hook
1 skein medium weight yarn (color of your choice)
snips
tapestry needle
For smaller flowers:
size E/4 crochet hook
1 skein Aunt Lydia’s crochet lace (size 3)
snips
tapestry needle
Instructions:
Worked in multiples of 5
(15 at minimum for rose-bud look; 20-25 for full-bloom look)
ch. 15 + 3 and DC 1 into the 4th ch from hook;
*ch 1, then skip 1 ch; in next ch sp <DC 1, ch 1, DC 1>;*
repeat (*) across ch, and in the last ch <DC 1, ch 1, DC 1>;ch 2 (counts as 1 DC) then turn work; 1 DC into the 1st ch sp, then ch 2 and DC 2 again into the same ch sp;
skip next ch sp, then in next “V” shaped ch sp <DC 2, ch 2, DC 2>; Repeat across row;
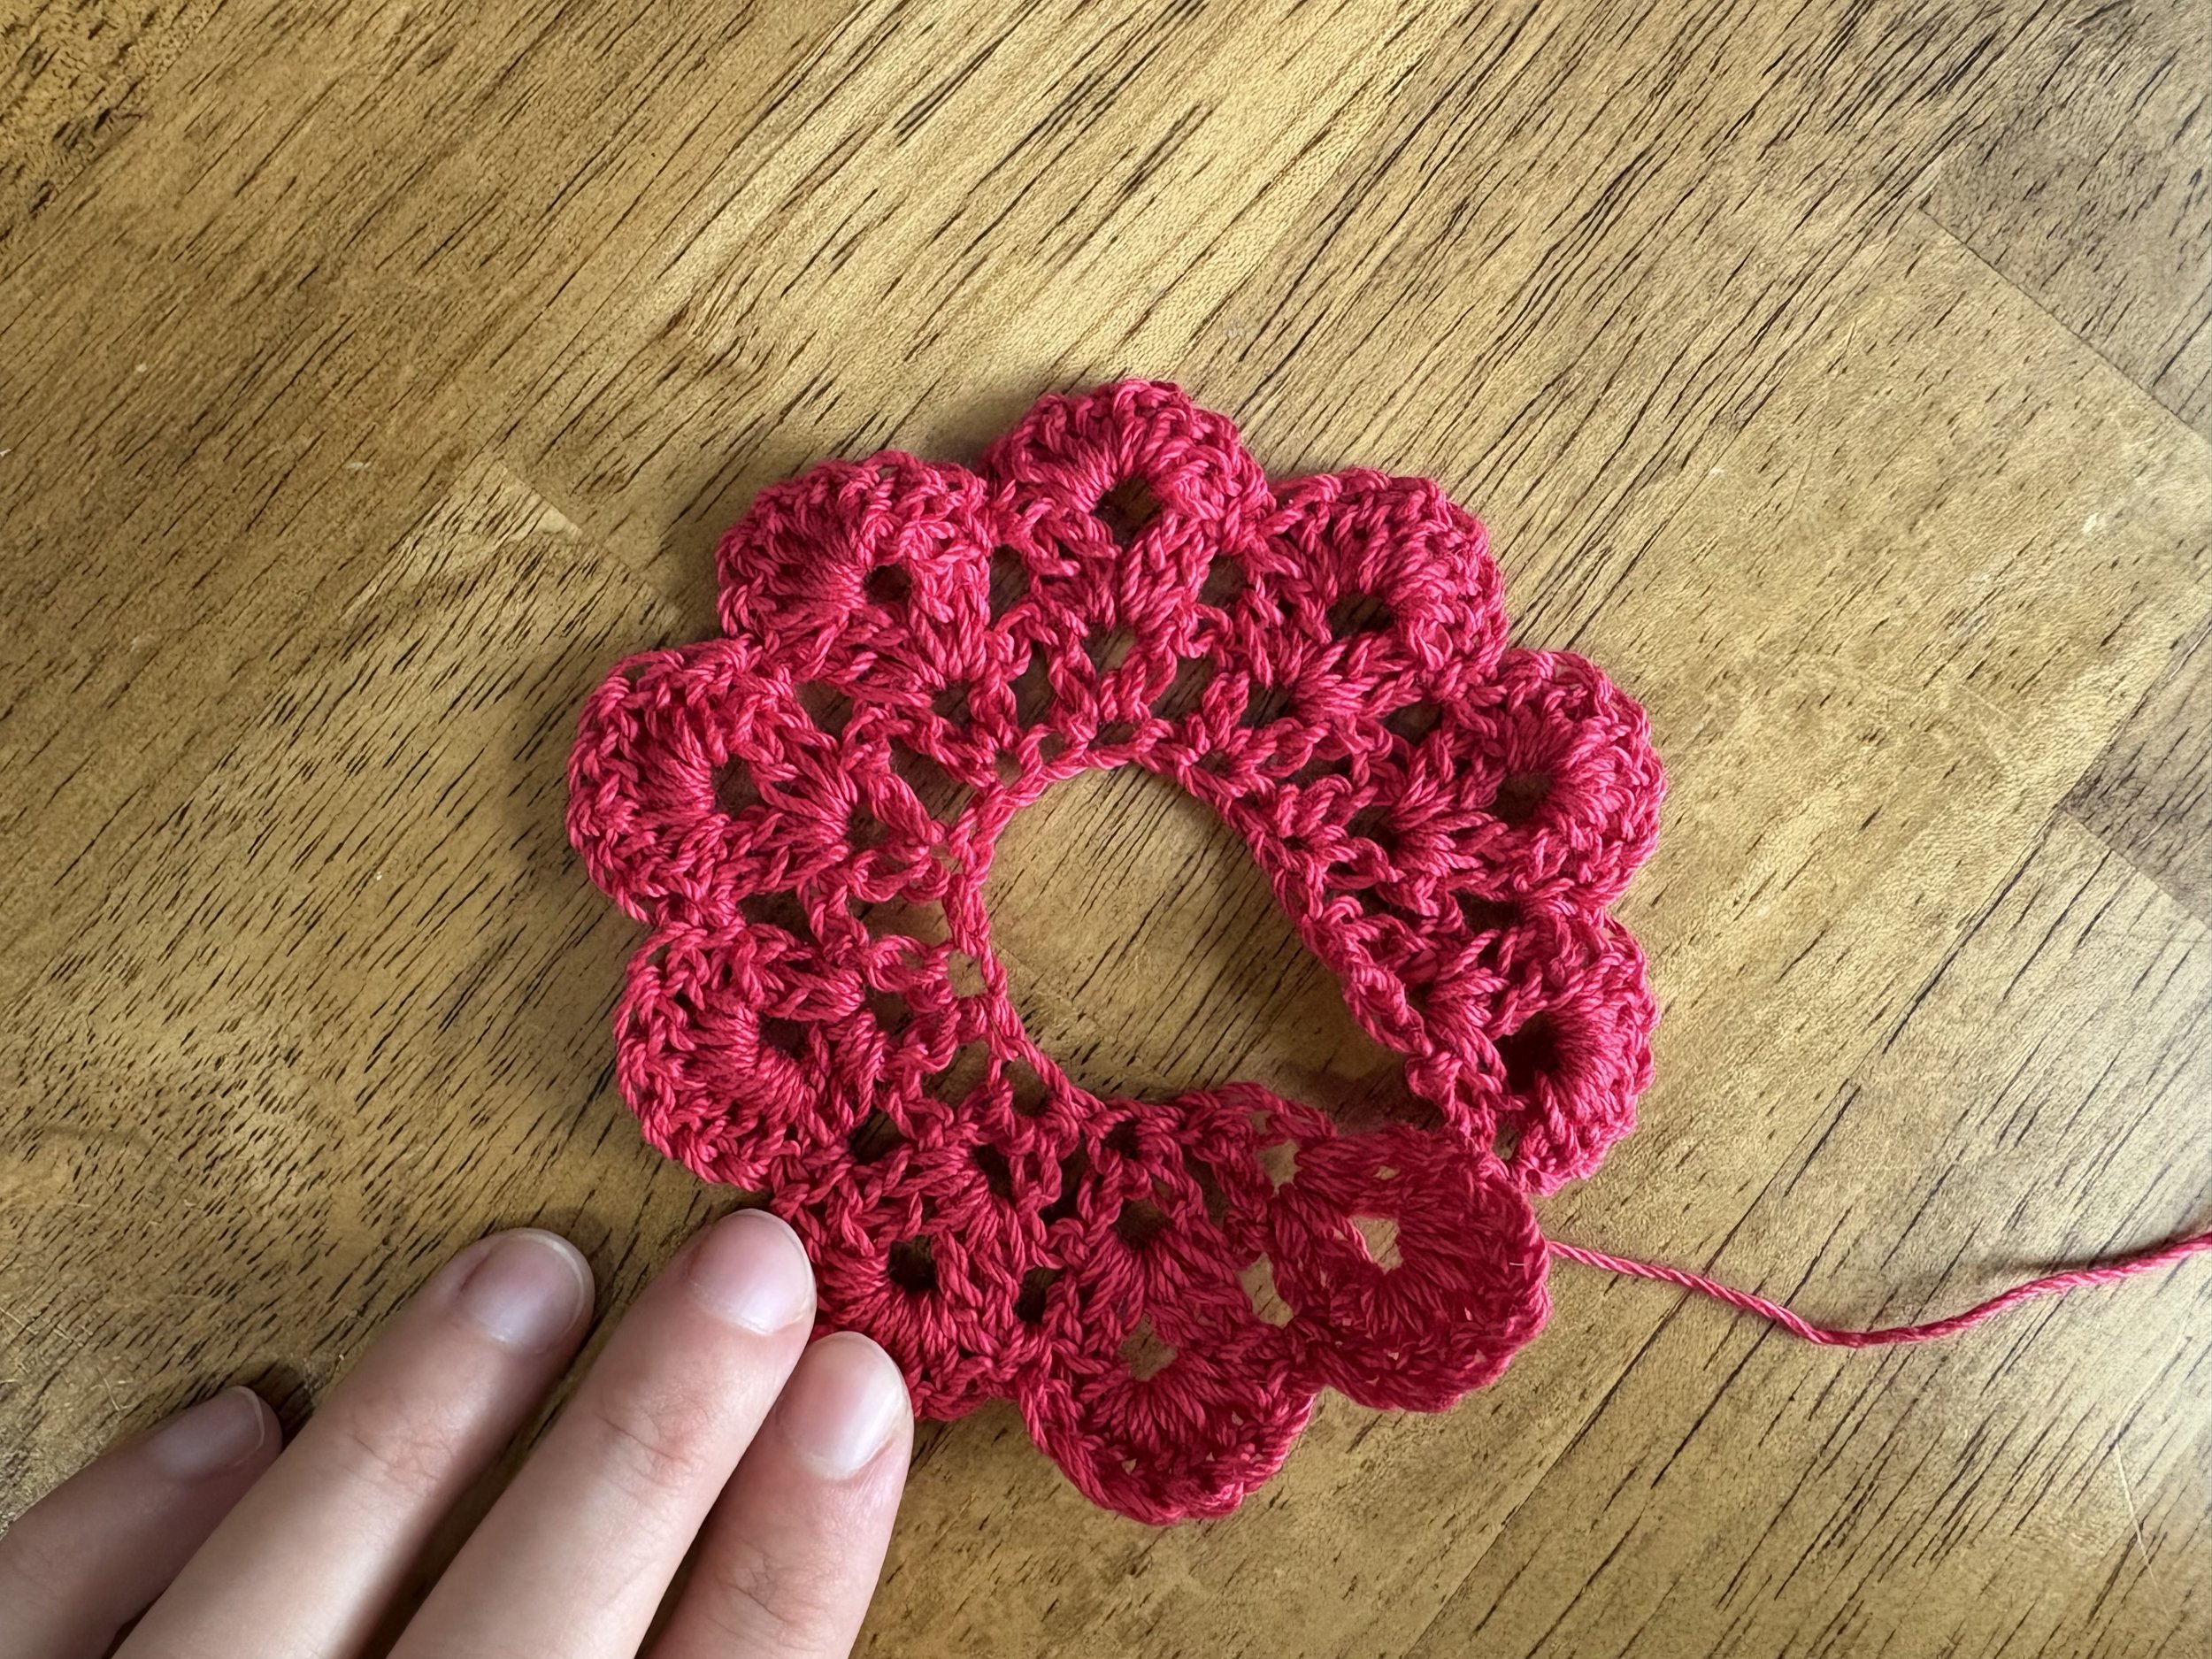
turn work then, without chaining, **dc 8 into the 1st ch sp; sc 1 into the next ch sp between 4 DC;**
Repeat (**) across rnd to create the rose’s petals;SC into the last DC; then clip 10-12 inches of yarn and secure;
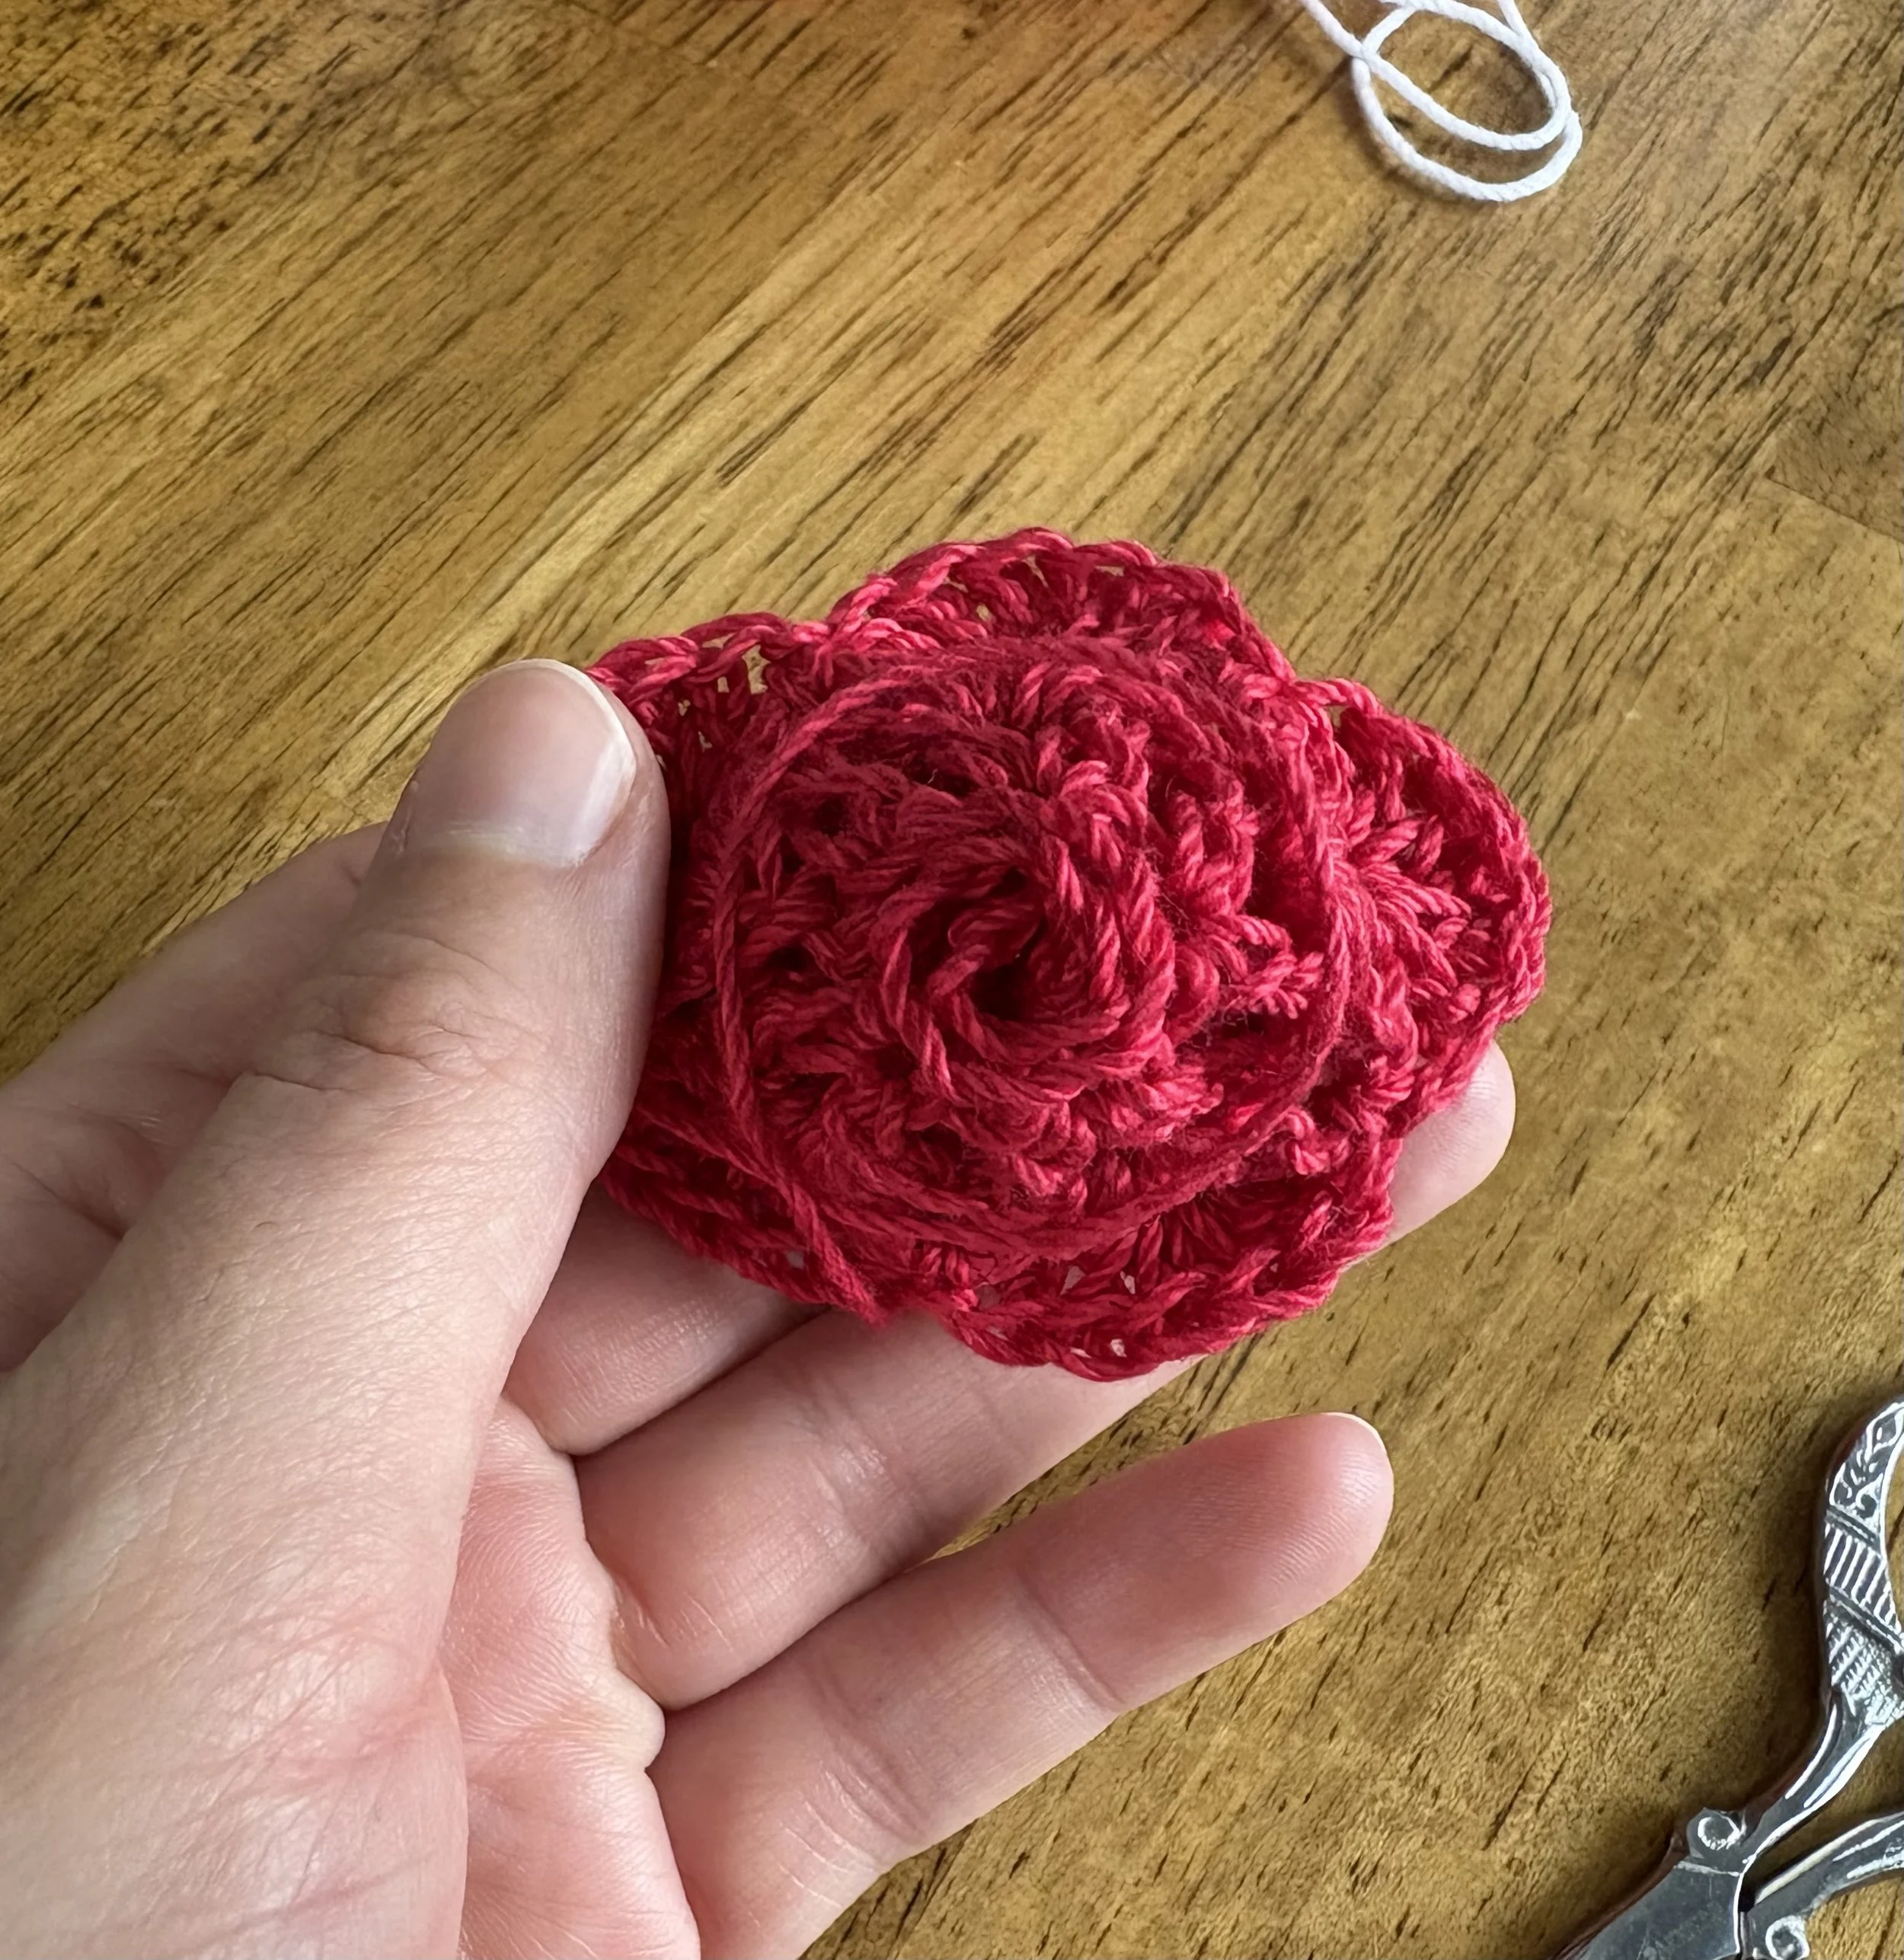
roll the rose together, starting with the petal opposite the length of yarn - this side (where the yarn is hanging), should be on the outside of the rose to allow for ease of stitching;
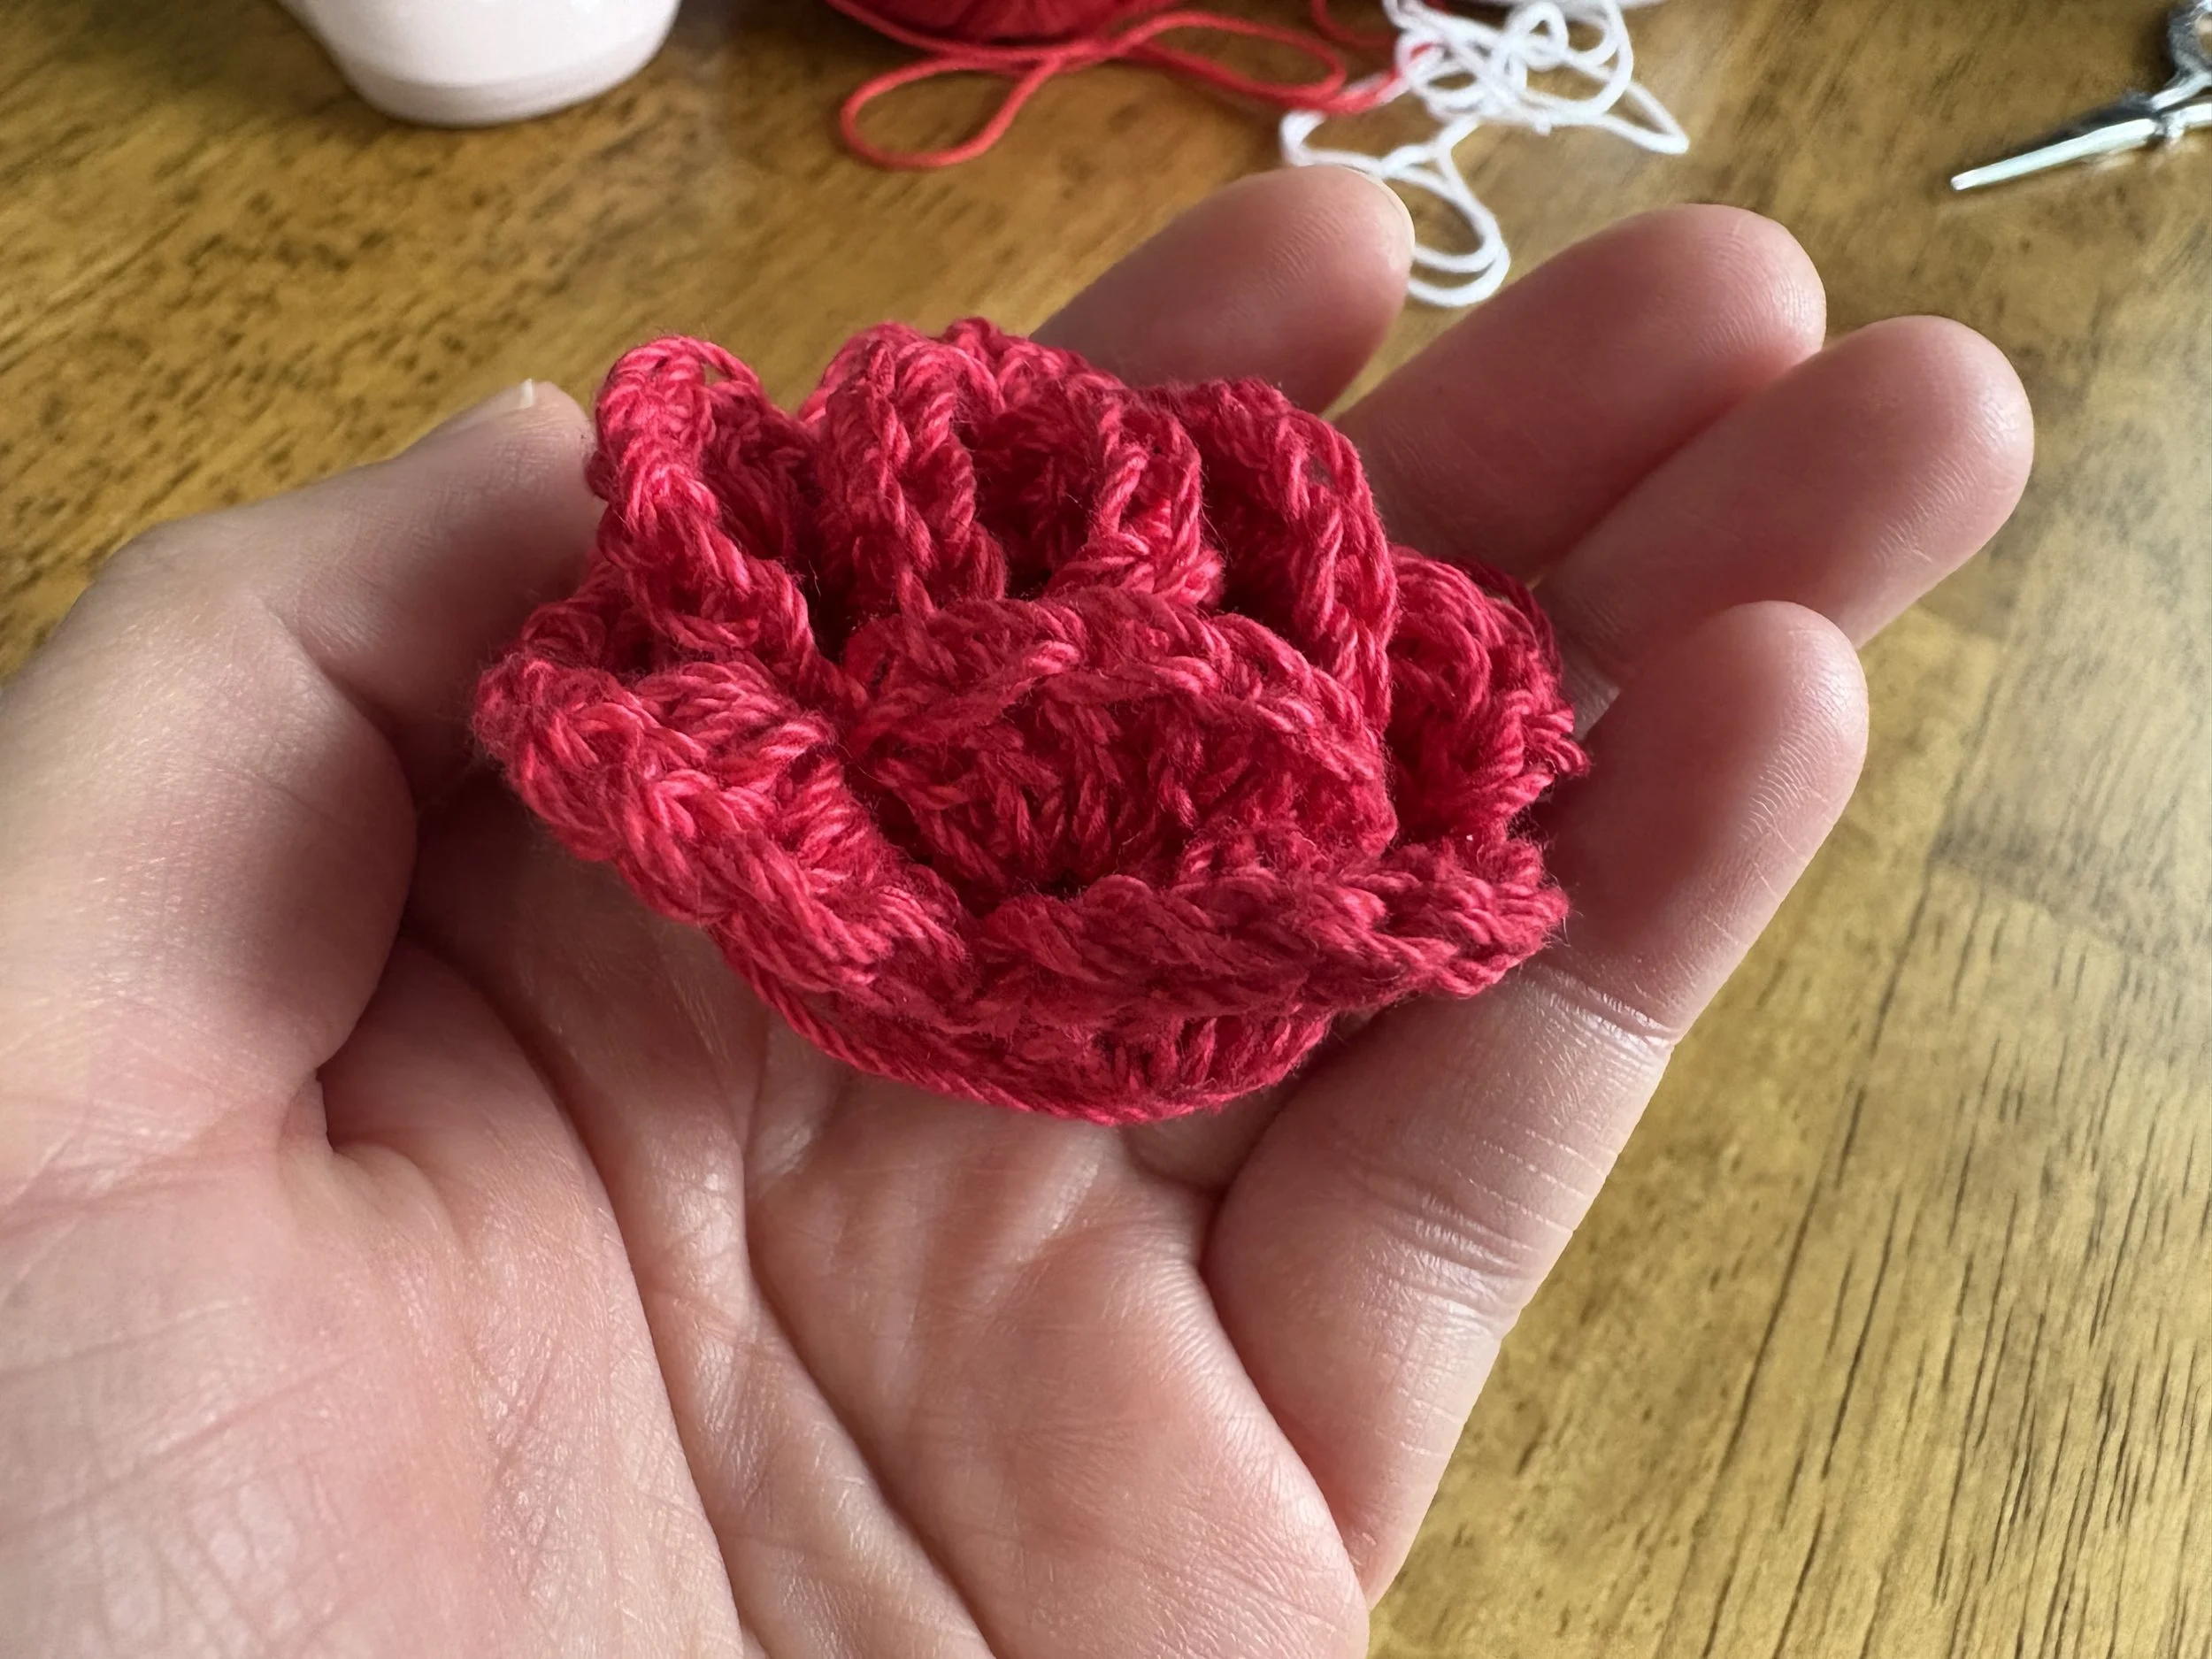
Next, thread your tapestry needle with the length of yarn still attached, and whip-stitch along edge of the petal and to the center (this is where the foundational chain will form a spiral);
stitch the foundational chain together and secure with a slip stitch; then tuck excess yarn through the center of the rose, and carefully clip away for an invisible finish